Wednesday, February 19, 2014

Decorate To Celebrate Design Challenge "3D Flowers"....Paper Dahlias

MY STORY

     As I was working on my submission for the Design Team at Decorate to Celebrate (call out was for 3D flowers), I received a call from a girlfriend who was in the throes of planning a baby shower for her daughter. "I need some ideas for place settings and favors that are cheap and easy to do, so I thought of you."  Well, ok?  I've been called worse!  So the timing couldn't be better to come up with an idea for both assignments.  Just as as was sitting down with my vast inventory of arts and crafts supplies, my inbox flared up with my new email from MarthaStewartweddings.com with the subject line "Paper Flowers How-To".  Divine intervention!

     So following the suggestions from my idol and her team, I came up with a simple paper dahlia using tissue paper I got at my favorite dollar store and I think the results are cute.  Have fun!


YOUR TURN

     What you will need:
-tissue paper - colors and/or patterns up to you
-Scissor
-Ribbon or Raffia
-container - for my examples I used small glass candleholders and a small mason jar

     Now get started:

1.  Print out the template from the webpage (http://www.marthastewartweddings.com).  You can enlarge or decrease the size based on the size petals you want.


2.  Fold your tissue paper in half lengthwise and then in half from right to left.

3.  Line up your template - making sure the straight edges of the template are on the folds of your tissue paper (you will know if you don't do correctly, as you will have a fractured petal - but don't worry, you can always put that to good use on a later project!).

4.  Cut out and you should have two full circles remaining.  Layer on top of each other, staggering the location of the petal tips.


5.  You can create as many layers with as many different types of tissue paper you want.

6.  For my example, using a small candleholder, place your container in the center of the circle and gather around the container.  This is the same process regardless of what type of container you are using.

7.  Wrap with raffia and/or ribbon and fill your container with goodies - I thought the gumballs looked festive, but use anything that may fit with your particular theme or event.  Once you have it securely tied, fluff up the paper petals until you get the look you want.
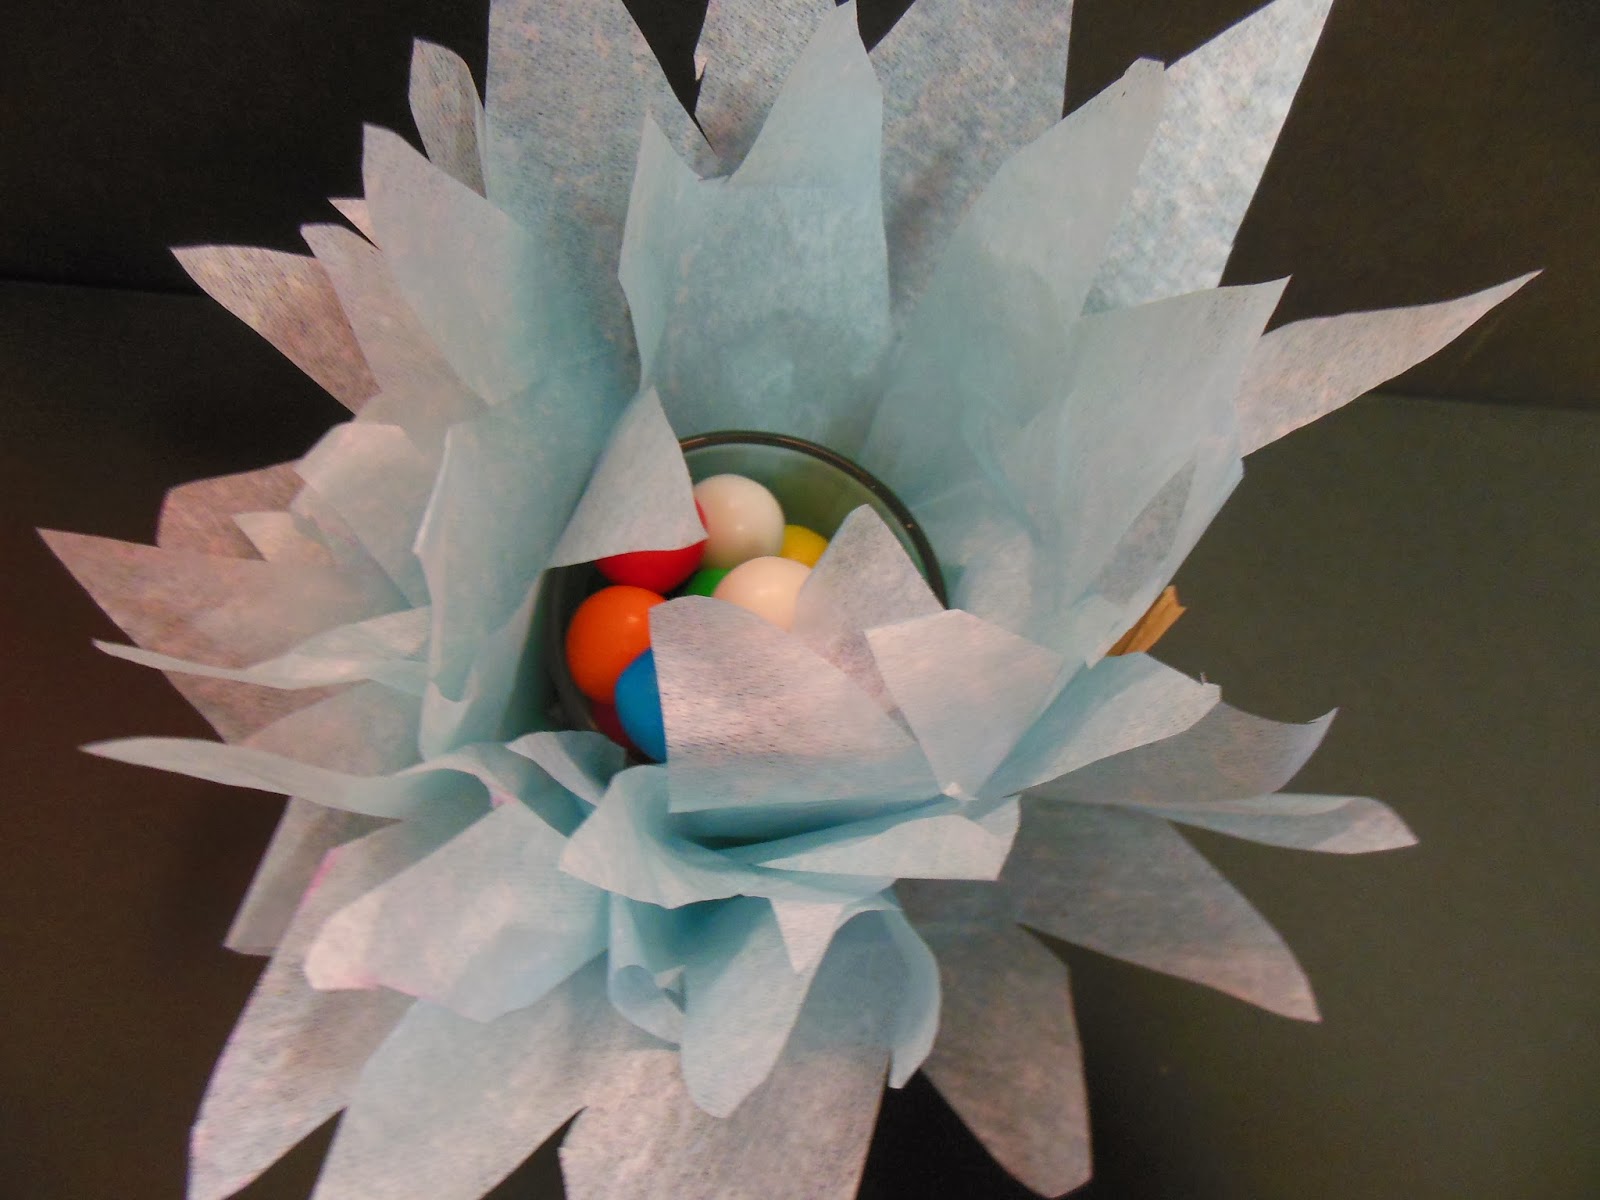

Here are other examples using different types of tissue paper and containers:

Using the same flower, but placing it inside a glass as opposed to wrapping around.  Fill the glass with sand, river rocks, beads.  Every choice will  lead to a unique look.
Using some striped tissue paper changes the look again.


Using two tones of a natural colored tissue paper around a small mason jar would look great in the Autumn. Could be a great gift idea -- fill the jar with the components for your favorite soup recipe.

Think red, white and blue for July 4th or green and red for the Holidays.  I love projects that make me feel like a kid again and I hope you find it fun as well.

Saturday, February 8, 2014

Confessions Of A Paper Addict

MY STORY
        Ok, I admit it.  I'm a Paper Addict...and  I know there are many of you out there like me.  Oh, I try to pretend by having every gadget known to man for high-tech note taking and synced calendars and appointment reminders.  However, there is still nothing as beautiful to me as the sound of a pen on paper.

      Like some of my friends hide new shoe purchases, I horde notebooks.  I have notebooks of every manufacturer and each of  them has a very specific purpose:  My Moleskine for sketching, my Rhodia for general note taking, my Levenger Circa notebook for my planner and a whole slew of lined, blank, graph, storyboard pages.....yes my problem is vast.

     Like the sweet enabler he is, my husband introduced me to a product with a cult following that I, shockingly, had never heard of.  Called The Traveler's Notebook by Midori, this little wonder is like a precious treasure.  First of all, the Japanese paper that comes with the notebook is beautiful and takes any type of ink with no bleed through.  And the beautiful, minimal yet functional packaging, is like a treat to open.
     And there are accessories you can purchase that can help you personalize your own Traveler's Notebook.  I had to get the graph paper and perforated sketchbook ones.  And charms, and bands and pen holders - Oh My!

     Along this journey I also discovered a great e-commerce site for my supplies.  Baum-kuchen is an amazing paper goods site and the owner, Wakako, sent me an email after placing my order asking me about myself, thanking me for my order and kept in touch with me until the moment my beautiful package arrived at my door!  Great site, check them out (www.baum-kuchen.net).

YOUR TURN

     Your new stationery adventure starts with the beautiful packaging and Japanese literature.  The Traveler's notebook comes in a heavy card stock envelope and then it is wrapped inside a lovely burlap bag (both of which I see incorporating into future crafting escapades).  My example is the dark brown full size Traveler's Notebook.  They also offer a passport size book.


 There is limited hardware and the simple leather notebook is  held together with a band.  It is beautiful as is, but the joy is in customizing it to suit your purposes.  To add notebooks (they recommend a maximum of two additional notebooks) you find the center of the supplied notebook and back that book up with one in the back and one in the front.  Find the center of those books and add your band.  If the following pictures don't do it justice, there are many blogs out there as well as YouTube videos.  I will post my favorite one at the end of today's entry.

Notice the YouTube tutorial playing in the background!

     I also changed the outer band with an orange one.  I  added the accessories of the pen holder and adhesive pockets - great for business cards, receipts and a larger pocket that has one end zipped and the other open.  Great for collecting scraps of memorabilia on your travels.  You just feed that piece underneath all the books.


     Just by starting to handle this, the leather is just gorgeous to the touch. I think of my artist friends -- this book is a journal waiting to happen.  Makes me want to be sitting in a Parisian cafe sketching the world as it goes by.

      YouTube tutorial from The Goulet Pen Company


Wednesday, February 5, 2014

You've Been Framed! Valentines Gift Box

MY STORY

     Are you looking for a different custom box for your loved ones this Valentines Day?  Something a little special to present those diamonds, chocolates or car keys perhaps?  Here is my current submission for the Decorate To Celebrate Design Team.

     I enjoy creating gift boxes that could serve a dual purpose.  See below for an easy project that is not only a cute gift box, but a stand alone frame.  I love two gifts in one!


  YOUR TURN
     See how easy it is to create this yourself.


Wednesday, January 29, 2014

Operation Write Home - Crafting For A Cause

MY STORY


     There are many charities I am honored to support each year.  But I have been looking for a way to actually give more of me, my talents or time.  And I am happy to say I have found the perfect match!

     As the Mama of a US Marine Corps Lance Corporal stationed overseas I know how difficult it is for him to send a note on special occasions -- yes there is Facebook and SKYPE -- but there is nothing like getting a card on your birthday or Christmas.  And for so many of our troops it is just not possible to pop into a Hallmark store and pick the perfect card.

     And since I'm addicted to all things paper, how happy was I to find Operation Write Home!  Operation Write Home has sent over one million handmade greeting cards to deployed service members around the world.  As they say, "There's no card store in Kabul or Baghdad".

    Of course you can donate but they are also looking for people to create all occasion cards.  There are some restrictions but they have a great facebook / web / blog site.  You can even get a free rubber stamp for the back of your cards!  You can send cards filled out with words of support and gratitude to help them feel as special as they should as they are serving our country in lands far away from home.

YOUR TURN

     Please think about putting some of your pent-up creative talent to good use!!!  This is a great project for you to do together with:


  • Your girlfriends -- get a couple of bottles and some basic art supplies and have fun with it!
  • Your boy scout / girl scout troops -- this would be fun for the young men and women in the scout system to support our heroes
  • Church / school groups -- hey teachers this would be a fun project for those busy little hands!
There is great info on their blog and website and lots of fun and free items you can get to inspire you.

OPERATION WRITE HOME
www.operationwritehome.org


     Wouldn't you like to make the day of these hardworking heroes?


Wednesday, January 22, 2014

Valentines Treat Bags

MY STORY

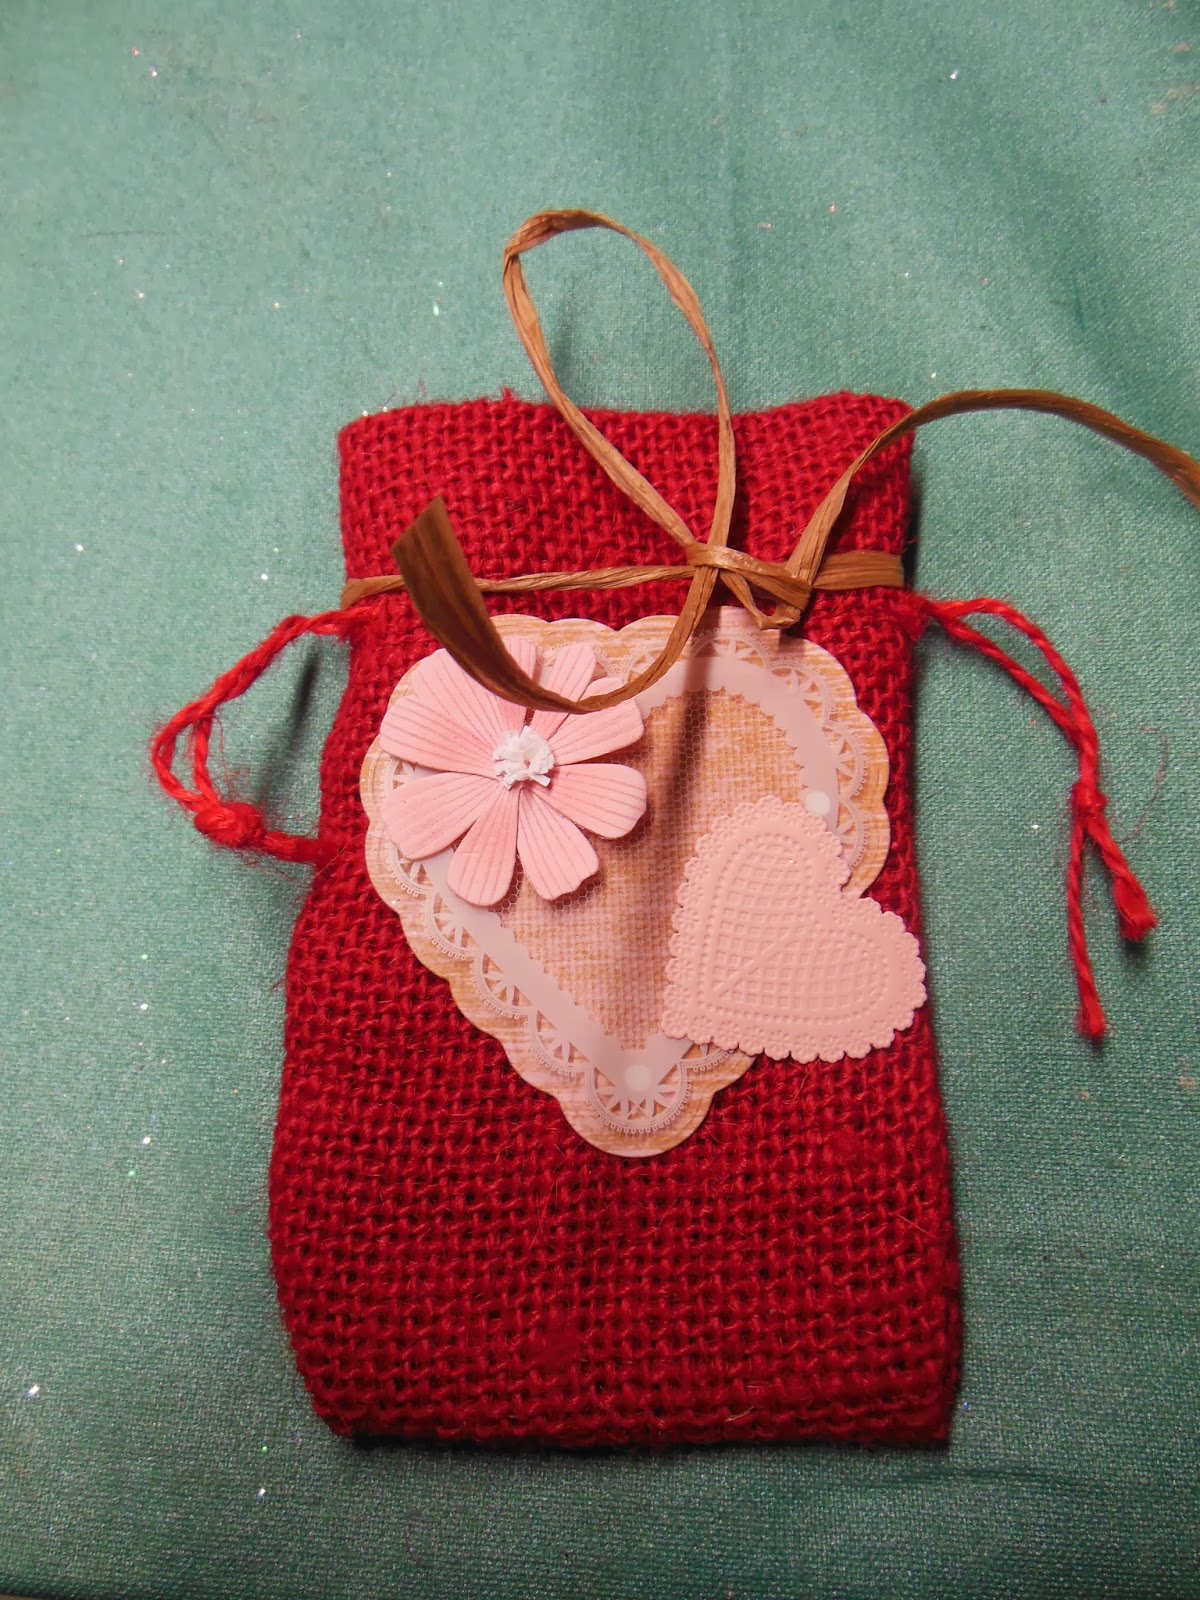
     The next challenge for the Decorate to Celebrate Design Team is Valentines Treat Bags.  I found these adorable mini burlap bags in the clearance bins and knew I had to use them!
      With a great selection of stickers from Martha Stewart and Michaels, this was a quick and easy way to have cute little bags ready to give out to all my Valentines :)

YOUR STORY:

   What you will need:

Stickers, raffia, ribbons

Mini Burlap Bags


     Start layering on the stickers and some you can just leave plain, it is really all up to you.  HINT:  Leave the "background" sticker on the plastic sheet it comes with.  It is easier to layer and then pull up the finished piece.  Sometimes I add a little glue for extra staying power.
Layer various stickers in different combinations

Adhere to the front of your bag
     I think these treat bags are very sweet and are perfect for little treats or potpourri for sachets.  I have told my husband jewelry would fit quite nicely in these also!  And since there is little cost and time associated with making these bags, I like to make a big stash and keep them handy for dentist's staff, mail carriers, teacher gifts, etc.  Have fun and show someone you love and appreciate them this Valentines Day.  xo


Add a ribbon loop so you can hang from a doorknob


Saturday, January 18, 2014

Weaving Sticks...Not Your Grandma's Knitting

MY STORY

     On my crafting bucket list, there remains some key things:  learning to sew, learning to knit.  And a few hundred more, but these are at the top.  At an industry craft show, I attended a workshop sponsored by Clover Needlearts.  Well, all I can say, is I'm hooked.  This is a great project for using up your yarn supplies and it is so much fun to do.  You are only limited by your imagination.

     I am newer than a newbie, so I'm leaving the instructions up to the professionals.

YOUR TURN

     My favorite crafting blog, Craft Test Dummies, has a wonderful tutorial on the Clover Weaving Sticks.  Check it out, this a great blog. In addition to one of the best blog names, they have amazing information and the best tutorials.

Craft Test Dummies Blog

     YouTube is another great resource for craft tutorials.  Here is one from the manufacturer.  This is an affordable and portable craft and until I learn to knit one and purl two, I am all about Weaving Sticks by Clover Needlearts.


Wednesday, January 8, 2014

Decorate To Celebrate Design Team Challenge

MY STORY

     As I sit watching the snow fall and the ice forming, it was a perfect time to do my first Decorate To Celebrate Design Team Challenge - snowflakes!

     In my post-Christmas sale shopping, I was able to acquire beautiful ornaments for a ridiculously low price.  I had found a white twig in our garden which gave me the perfect stepping off point to create a snowflake banner.


YOUR TURN
     The Paper Source has a great supply of banner blanks which I covered in winter themed paper.  Using ornament hooks I just hung the ornaments off the twig and applied some stickers onto the paper and the twig itself.  This is an easy way to brighten up a window and great for the kids to help out with.  It may be stormy outside but having this banner on my studio door makes me appreciate the beauty that a Northeast winter can bring.


Wednesday, January 1, 2014

Recycled Holiday Cards

MY STORY

     I love receiving Holiday cards.  Not only do I enjoy reading about my friends and families adventures, there are so many beautiful cards that I hate to throw them away.  In addition, my ritual post-Christmas shopping involves buying up more cards and Christmas supplies at crazy prices.  Now, that makes me happy.

    So I have come up with a few ideas to use your holiday cards while saving some trees and money for next holiday.  (As a crafter, we are always a few months ahead of the calendar).

   Be creative with these ideas and show me what you come up with.  These concepts can also be applied for cards you get and send throughout the year.  The potpourri sachet idea?  Just by using a different type of card, this can be made into a cute teacher's gift, or a birthday gift.  Crafts are not just for Christmas!

YOUR TURN

    Please take a look at my ideas....this is also a great activity to do with the kids on those snowed in days.


Monday, December 30, 2013

Crafty Bargain Hunter

MY STORY

     If you are like me, nothing says Christmas like the after Christmas sales.  I'm not talking about electronics or handbags, but craft supplies and holiday cards.
     Today's outing took me to some of the large and small craft stores in my neighborhood.  With coupons and Christmas crafting items up to 80% off (wahoo), I have stocked up on some great last minute gift supplies and started compiling my stash for next year - I know it is a sickness but who cares?  More on how to use holiday cards later, but here are a couple of quick and easy ideas that cost next to nothing to do.

YOUR TURN

  I love having some cute coasters made as last minute house party gifts or home decor.  I use these year round, but with the Christmas bargains and some other supplies you can create fast, easy and inexpensive gifts.  For the coasters you will need:

  • Rub On Transfers.  There was still a large collection of holiday transfers available and with dramatically reduced prices, each package (which can create 4 coasters) was about $1.20.
  • Mod Podge
  • Felt backing (I have a big supply of the round felt pieces I got at a home supply store.  Package of about 50 pieces was only $2.99)
  • Tile Coasters - I also got these at a  home supply store.  They are slightly irregular so you may not want to put them up as a kitchen backsplash, but for crafting they are perfect.  Box of 10 about $2.00.
STEPS:
  • Cut out transfer image, peel off backing and rub onto tile.  That is it!
  • Cover with Mod Podge and when dry add the felt backing.  These coasters are great with both warm and cold beverages and how cute!   Wrap them up in a big ribbon and they make a great housewarming present.  


   There are so many great transfers available, you can whip this up before you head out to that New Years Eve party tomorrow.

   I have some pretty diverse styles when I decorate and in parts of my house I am all shabby chic and pastel and then sometimes a girl just has to glam it up.  I like these modern trees and trust me they are so simple to make.

     You will need:

  • Styrofoam cone shapes.  With the markdowns I was able to snag these for $1.00 each.
  • Bottles of glitter - depending on what color you want to use.  The holiday colors were marked down so I scored three bottles for about $2.00 each.
  • Spray on adhesive
  • Foil roasting pan - I don't cook but love these for crafting. You will need one for each color glitter.  
  • Wire - comes in various colors and gauges, I like the thicker gauge for this project.

STEPS:
  • Place the trees in the roasting pan and cover one tree at a time with spray adhesive.
  • Dump the glitter into the pan and roll the tree around until covered.  Let dry.  HINT:  The glitter you don't use can be put back in the jar for future projects.
  • Wrap the wire as desired - no pattern, free form seems to work better.  And you are done!


Sunday, December 22, 2013

DIY Art

MY STORY

     I am always that annoying person gathering up paint swatch cards, Pantone chips and sample bottles of wall paint.  Since I was a kid, I have this need to continually switch up the wall colors in my house, add different artwork which can get kind of expensive.

     I have come up with some easy ways to create simple artwork out of washi tape, fabric scraps and antique scarves.  Here are some ideas.  Show me what you come up with.

YOUR TURN

     The supplies you need are inexpensive and easy to find:

  • Blank canvas; foamboard; styrofoam shapes;old frames
  • Washi tape; fabric scraps; paper; old clothes.  Any items that you want to use works well
  • Scissors; fabric glue; T pins; 
  • Mounting tape (this works great for these lightweight items and anything that doesn't require a hammer and nails I'm happy with).
ANTIQUE FABRICS:

     I inherited a lot of scarves from my Grandmother.  In every photo and in many memories I remember these little squares of fabric.  These are not items I want to cut up or manipulate and I found that just putting them in frames gave them the respect these memories deserve.


HOLIDAY IDEA

     After all my wrapping was done, I found I had a lot of washi tape left over.  I simply took some of my favorites and wrapped around a lightweight piece of styrofoam.  I like using an odd number of colors/images.  Randomly tape around and you can use with T pins to hang your holiday cards on, or cover with a coat of Mod Podge for extra durability and place on your table.  


MEMORIES 

    A good friend of mine had been saving a lot of her father's old shirts; pants; ties to make a baby quilt for her little boy.  Unfortunately, Hurricane Sandy hit us pretty hard and she lost almost everything.  She had very few scraps to work with.  We came up with the idea to use these little bits wrapped on small canvas and put on little easel stands.  Her baby's bedroom was a nautical theme, so the blues worked out well.  Although it was not the quilt she had imagined, just this little display keeps her intention alive of having some of Dad's clothing around for her son.


FABRIC

     Couple of projects I have been working on is to create easy and inexpensive art for friends.  Using foamboard, canvas and/or styrofoam I go through my fabric stash and have been able to do some fun artwork for them.  The first example is actually for my studio.  I wanted a Bonnie Cashin/fashion illustration/Parisian feel to the work.  When you decide the background piece you are using, lay your fabric out, place the canvas as top to insure you capture the image you want and cut out, leaving an inch around for wrapping the canvas.  For this illustration I used a dark pen, but use a pencil or disappearing marker for best results. Then wrap around the foamboard, adhering with some glue.


     For my friend's newborn twins, a boy and a girl, I was excited to find this Debbie Mumm fabric.  Same Noah's Ark theme, but in two different colorways.  HINT:  If you are deciding to use canvas as your backing, many of them come individually wrapped in plastic.  Keep the plastic on.  If you change this art later, it is easier to remove and you have preserved the integrity of the canvas.


     You can also layer fabrics - this is for a little girl who was growing out her baby room and my friend wanted modern, but still girly art.  This fabric came with a natural frame around it, so I thought it was a great one to use, backed by a complementary fabric on canvas.


     So if you are addicted to changing up your home decor like I am, these easy and inexpensive projects will soothe your guilty conscience next time you are switching things up.