Friday, March 21, 2014

When Inspiration Strikes...what a feeling!

     While strolling through my local nursery during their annual flower show, I was feeling so inspired walking through all the beautiful plants, flowers and visual set ups.

     What I didn't expect to see was an art piece, celebrating their nursery, that had me completely spellbound and now obsessed.

     Take a look at this amazing piece.....I have been looking at the pics and coming up with ways to incorporate this idea into future projects.  I just love the all black, tin types, old photos.......the steampunk vibe.

     When I feel inspiration like this, it is like no other feeling in the world.  Well, after love and chocolate anyway.  Stay tuned for what I come up with!


Wednesday, March 19, 2014

Decorate To Celebrate Challenge "Spring Decorations"...Around the House Floral Containers


MY STORY

     I love to find items to repurpose in my crafting.  Call me frugal, but I truly enjoy trying to discover more than one way to use something. Or to use it over and over again.

     As I was thinking about Spring Decorations for this Decorate To Celebrate Design Team challenge, while sitting in the Northeast waiting for another snowstorm to descend, I just kept going back to flowers.  I have a garden full of flowers and herbs once the Spring and Summer come back and I love coming up with simple arrangements that would be great for party favors, table settings; something for your nightstand so you can see one beautiful bud in the morning.  I tend to like minimal arrangements, but these ideas can be adapted to any look you like.

    The key is to look for different objects to use as containers.  All my examples are with silk flowers, so I can hardly wait to implement with some real beauties that are currently sleeping under the snow.

YOUR TURN

     While my husband and I were doing some renovating around the house, I kept the doorknobs.  What I loved is that these doorknobs were original to the home, circa 1940 and I fantasized about all the hands that touched it.  I added one stem and I thought it looked very elegant in this setting:


     My son is 19 but for whatever reason I still have baby food jars.   Again, very simple but a grouping would be so cute.


          I had some small mason jars left over from Christmas crafting and even though it is Spring, I liked using some of my fake snow for filler.  Again, use your imagination - fill the jar with marbles or sand or pinecones for the winter.


     Votive candle holders are very affordable and you can purchase them in a large box for very little money.  My examples are very plain and you can spruce them up in a million ways.  Since they are so affordable, imagine tons of them around a table.  Elevate some of them to have different heights.


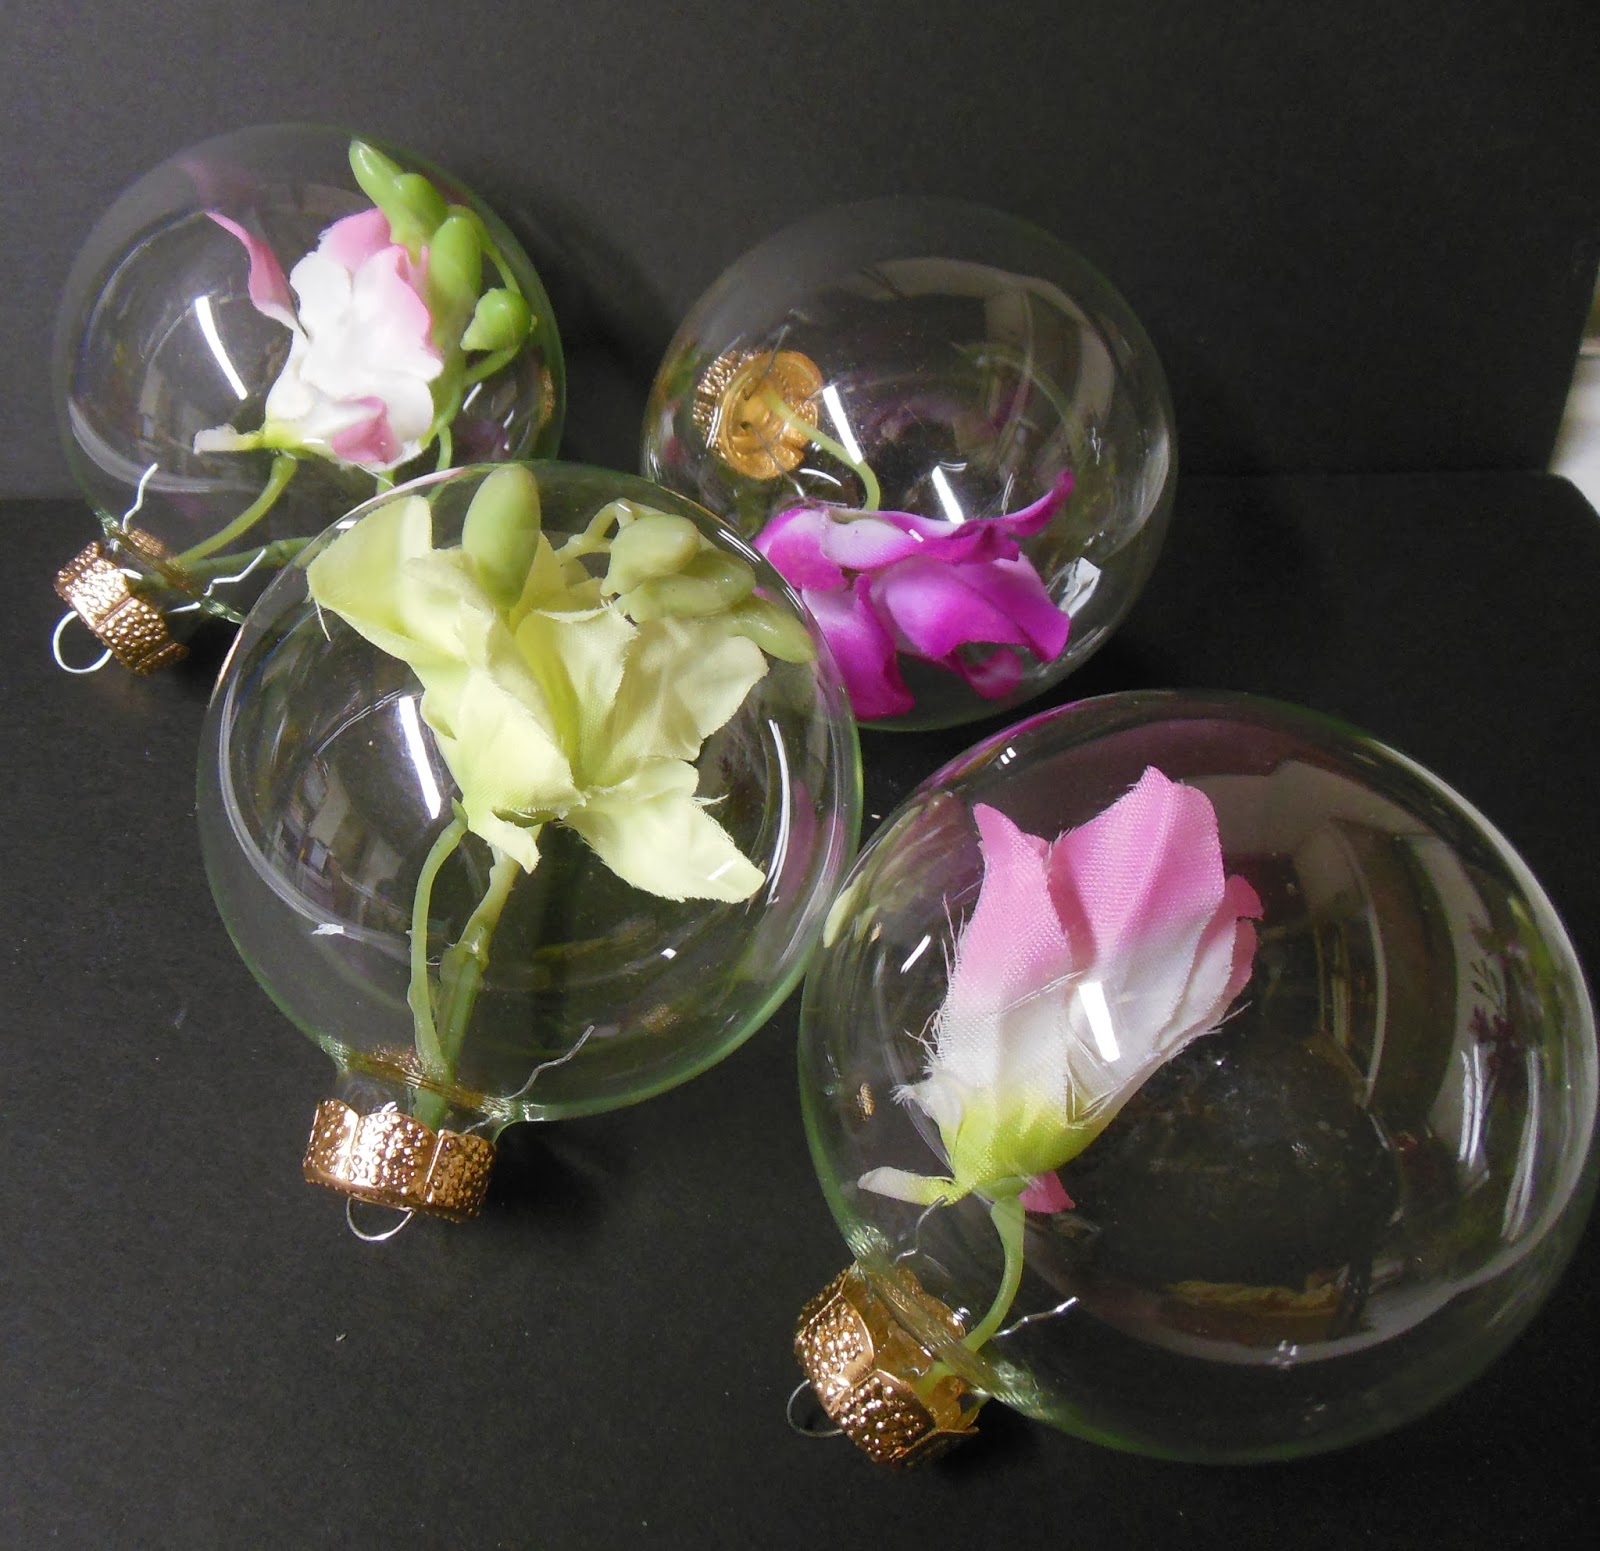
     I'm usually overly enthusiastic when it comes to buying supplies for Christmas crafting.  I had many clear ornaments left over and I thought, why can't I use these?  Be careful with delicate flowers.  With the silk ones, I just pinched them together and fed them through the opening.  You can place a bunch of these in a beautiful springtime bowl or hang from an indoor tree.  Even think about adding some glitter inside the ornament.  I also added them on top of the votive candle holder from above and I think it makes a unique vase.


   I hope I have given you some inspiration on making unique flower containers.  You are only limited by your imagination!


Monday, March 17, 2014

Accidental Art


MY STORY

     My little craft room is not always heated and after this LONG Northeast winter, there were some casualities among my art supplies.

     However, this little gem turned up.  One of my glue bottles was leaking, or exploded, and froze.  You can even still see the little red cap.

     Now there are no accidents in life so the next question is......what can I use this for?


YOUR TURN

      C'mon....I need some ideas from some crafty friends out there.


Friday, March 7, 2014

Kickstart Your Creative MoJo

MY STORY:

     I truly believe that we are all creative in many different ways.  But sometimes with family, work, laundry, bill paying....it may be hard to find that time for yourself to reboot some of your creative mojo.

     While wandering through Barnes and Noble, I happened upon these books that I wanted to share with you.

YOUR TURN:

   Chronicle Books (www.chroniclebooks.com) +Chronicle Books  has published these addictive paperbacks that you can use to unleash your inner creative diva.  First up is "642 Fashion Things To Draw".


    The book leads you through 642 exercises and prompts you with ideas on what to draw.  Some of my favorites are:

  • A tattoo you would never consider
  • A Lily Pulitzer Sundress
  • The First Lady
     And the one I'm trying first:

  • A Voluminous wedding dress from the 80s (I can just look at my old wedding photos for inspiration on this one!)
     Other books in the drawing series are "642 Things to Draw" and "712 More Things to Draw".
>>>>>>>>>>>>>>>>>>>>>>>>>>>>>>>>>>>>>>>>>>>>>>>>>>>>>>>>>>>>>>>>>>>>

     And for all you budding Hemingways, pick up "642 Things To Write About".  Some really great ideas to get you thinking:

  • Your friend calls to say she saw you in the back of a police car yesterday.  What happened?
  • Write the lyrics of a catchy jingle for a plumbing service
  • A conversation you regret never having
   So get these books and start playing.  Have them in your tote while commuting, waiting to get your kids from school or pick one activity each morning while having your coffee.  Trust me, you will have fun!


Wednesday, March 5, 2014

Decorate To Celebrate Design Challenge "St. Patrick's Day"....Kiss Me I'm Irish

MY STORY

     Being of Irish descent, I just love St. Patrick's Day.  I always try to create something pretty for my studio door and since our assignment for the Design Team @ Decorate To Celebrate was St. Patrick's Day, I was ready to go.

     I tend to like using different colors than the standard shamrock green and with a great banner kit from The Paper Source, I love the way it looks.  Once again, my local dollar store didn't disappoint and I found fun little shamrock shapes.  They were perfectly fine as is, but I just had to use some paper and jazz them up.

 Hope you will be inspired to dress up your home of office with a touch of the green.

YOUR TURN

What you will need:
-(5) shamrock shapes -- you can also get templates on Google

-(5) complementary papers

-(5) Alphabetical banner pieces -- I love the banner kit at The Paper Source, but again, easy to find on the web.

-Scissors/Glue/Raffia

Now, let's go:

1.  Adhere the shamrock shape to the back of your chosen paper.  NOTE:  If your paper has a specific design or lettering, make sure you glue the shape right side up.


2.  Cut out and voila -- you have half your banner done.

3.  Using the banner kit, select the letters you want -- I chose to spell out "IRISH".  Lay your design out to insure you like the placement before you start gluing.


4.  Using a letter, then a shamrock, glue pieces together until done.  I kind of like my things off center, so I did not glue the pieces straight.  I like the movement the crookedness gives it.


5.  The alphabet tiles in the kit have holes in them already for stringing, so just add the raffia and that's it.  Simple and cute!


Wednesday, February 19, 2014

Decorate To Celebrate Design Challenge "3D Flowers"....Paper Dahlias

MY STORY

     As I was working on my submission for the Design Team at Decorate to Celebrate (call out was for 3D flowers), I received a call from a girlfriend who was in the throes of planning a baby shower for her daughter. "I need some ideas for place settings and favors that are cheap and easy to do, so I thought of you."  Well, ok?  I've been called worse!  So the timing couldn't be better to come up with an idea for both assignments.  Just as as was sitting down with my vast inventory of arts and crafts supplies, my inbox flared up with my new email from MarthaStewartweddings.com with the subject line "Paper Flowers How-To".  Divine intervention!

     So following the suggestions from my idol and her team, I came up with a simple paper dahlia using tissue paper I got at my favorite dollar store and I think the results are cute.  Have fun!


YOUR TURN

     What you will need:
-tissue paper - colors and/or patterns up to you
-Scissor
-Ribbon or Raffia
-container - for my examples I used small glass candleholders and a small mason jar

     Now get started:

1.  Print out the template from the webpage (http://www.marthastewartweddings.com).  You can enlarge or decrease the size based on the size petals you want.


2.  Fold your tissue paper in half lengthwise and then in half from right to left.

3.  Line up your template - making sure the straight edges of the template are on the folds of your tissue paper (you will know if you don't do correctly, as you will have a fractured petal - but don't worry, you can always put that to good use on a later project!).

4.  Cut out and you should have two full circles remaining.  Layer on top of each other, staggering the location of the petal tips.


5.  You can create as many layers with as many different types of tissue paper you want.

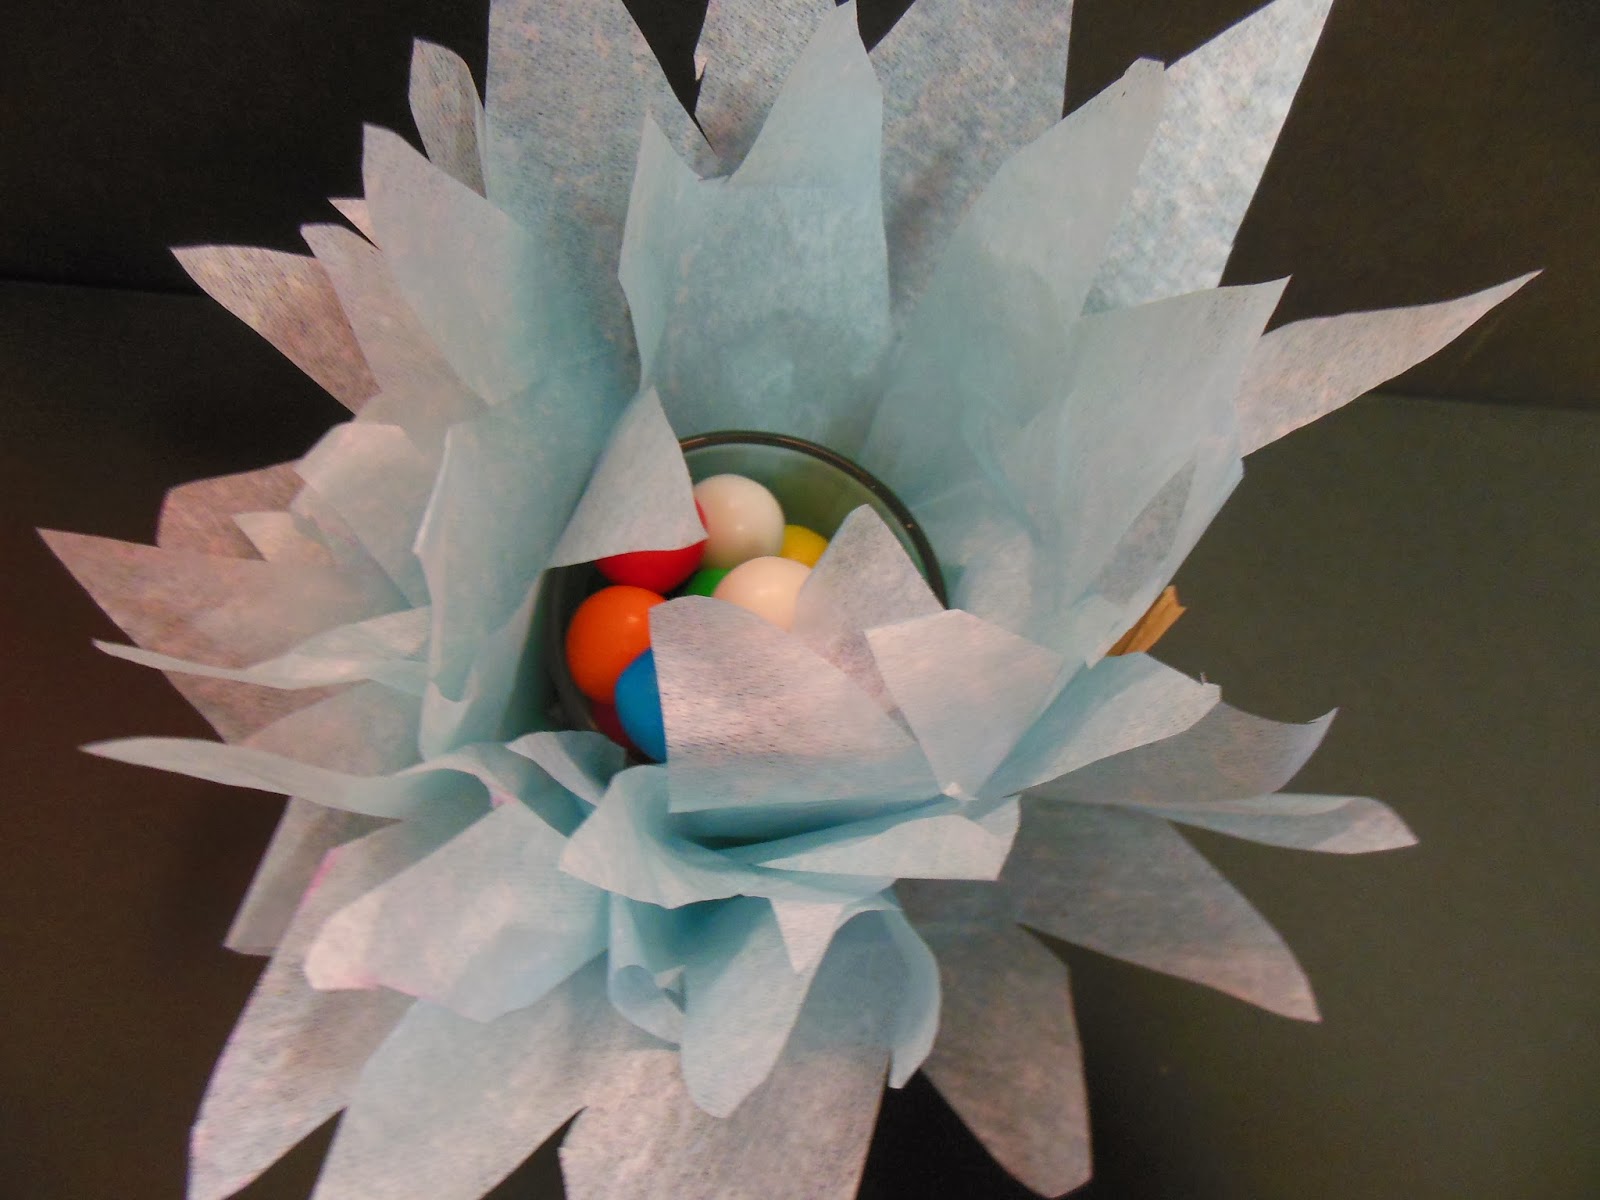
6.  For my example, using a small candleholder, place your container in the center of the circle and gather around the container.  This is the same process regardless of what type of container you are using.

7.  Wrap with raffia and/or ribbon and fill your container with goodies - I thought the gumballs looked festive, but use anything that may fit with your particular theme or event.  Once you have it securely tied, fluff up the paper petals until you get the look you want.


Here are other examples using different types of tissue paper and containers:

Using the same flower, but placing it inside a glass as opposed to wrapping around.  Fill the glass with sand, river rocks, beads.  Every choice will  lead to a unique look.
Using some striped tissue paper changes the look again.


Using two tones of a natural colored tissue paper around a small mason jar would look great in the Autumn. Could be a great gift idea -- fill the jar with the components for your favorite soup recipe.

Think red, white and blue for July 4th or green and red for the Holidays.  I love projects that make me feel like a kid again and I hope you find it fun as well.

Saturday, February 8, 2014

Confessions Of A Paper Addict

MY STORY
        Ok, I admit it.  I'm a Paper Addict...and  I know there are many of you out there like me.  Oh, I try to pretend by having every gadget known to man for high-tech note taking and synced calendars and appointment reminders.  However, there is still nothing as beautiful to me as the sound of a pen on paper.

      Like some of my friends hide new shoe purchases, I horde notebooks.  I have notebooks of every manufacturer and each of  them has a very specific purpose:  My Moleskine for sketching, my Rhodia for general note taking, my Levenger Circa notebook for my planner and a whole slew of lined, blank, graph, storyboard pages.....yes my problem is vast.

     Like the sweet enabler he is, my husband introduced me to a product with a cult following that I, shockingly, had never heard of.  Called The Traveler's Notebook by Midori, this little wonder is like a precious treasure.  First of all, the Japanese paper that comes with the notebook is beautiful and takes any type of ink with no bleed through.  And the beautiful, minimal yet functional packaging, is like a treat to open.
     And there are accessories you can purchase that can help you personalize your own Traveler's Notebook.  I had to get the graph paper and perforated sketchbook ones.  And charms, and bands and pen holders - Oh My!

     Along this journey I also discovered a great e-commerce site for my supplies.  Baum-kuchen is an amazing paper goods site and the owner, Wakako, sent me an email after placing my order asking me about myself, thanking me for my order and kept in touch with me until the moment my beautiful package arrived at my door!  Great site, check them out (www.baum-kuchen.net).

YOUR TURN

     Your new stationery adventure starts with the beautiful packaging and Japanese literature.  The Traveler's notebook comes in a heavy card stock envelope and then it is wrapped inside a lovely burlap bag (both of which I see incorporating into future crafting escapades).  My example is the dark brown full size Traveler's Notebook.  They also offer a passport size book.


 There is limited hardware and the simple leather notebook is  held together with a band.  It is beautiful as is, but the joy is in customizing it to suit your purposes.  To add notebooks (they recommend a maximum of two additional notebooks) you find the center of the supplied notebook and back that book up with one in the back and one in the front.  Find the center of those books and add your band.  If the following pictures don't do it justice, there are many blogs out there as well as YouTube videos.  I will post my favorite one at the end of today's entry.

Notice the YouTube tutorial playing in the background!

     I also changed the outer band with an orange one.  I  added the accessories of the pen holder and adhesive pockets - great for business cards, receipts and a larger pocket that has one end zipped and the other open.  Great for collecting scraps of memorabilia on your travels.  You just feed that piece underneath all the books.


     Just by starting to handle this, the leather is just gorgeous to the touch. I think of my artist friends -- this book is a journal waiting to happen.  Makes me want to be sitting in a Parisian cafe sketching the world as it goes by.

      YouTube tutorial from The Goulet Pen Company


Wednesday, February 5, 2014

You've Been Framed! Valentines Gift Box

MY STORY

     Are you looking for a different custom box for your loved ones this Valentines Day?  Something a little special to present those diamonds, chocolates or car keys perhaps?  Here is my current submission for the Decorate To Celebrate Design Team.

     I enjoy creating gift boxes that could serve a dual purpose.  See below for an easy project that is not only a cute gift box, but a stand alone frame.  I love two gifts in one!


  YOUR TURN
     See how easy it is to create this yourself.