Showing posts with label upcycling crafts. Show all posts

Tuesday, April 18, 2017

You Drink The Tequila -- I'll Keep The Bottle

MY STORY

     I love pretty packaging.  Many times I wlll buy an item just because I see potential in upcycling the bottle, jar or can!  My husband discovered these airline size bottles of tequila and I made him buy more.  As he is drinking his margaritas, I'm getting busy with some crafting.

    I have been loving the matte resin blanks from Relics and Artifacts and my vision was to create unique additions to the existing bottle tops.


   They take some time, but it's worth it.   You can use these concepts with anything, but here are my ideas.  Enjoy!

YOUR TURN

SUPPLIES NEEDED:

-Flaming Hearts Resin Blanks by Relic & Artifacts, designed by Sandra EverstonSHOP RELICS & ARTIFACTS
-Verday Paints by 10 Seconds Studio10 SECONDS STUDIO YOUTUBE
-Empty bottles
-Artists Loft acrylic paints in the colors of your choice
-Misc beads/crystals
-Small paintbrushes
-Disposable gloves
-Martha Stewart Crafts Gilding Kit
-Jewelry adhesive
-Glimmer Mist by Tattered Angels in Tarnished Bronze

The Queen Will See You Now:

Steps:

(For all bottles, clean the inside thoroughly with warm water and a little soap).  Try not to get the outside too wet as I wanted to keep all the labeling intact.) And look for my avatar for hints.

A.  Lay out various sizes of flat back crystals and place onto your pre painted piece.


HINT - take a photo of your layout once you are happy with it, so once you begin to glue after painting, you will know where your pieces go.


B.  Using acrylic paints of your choice, paint the piece.  Let each coat dry before you add another.  Spritz with a little Glimmer Mist to add some antique tones to your heart.


C.  Once your paint is dry begin gluing your crystals and beads as desired.

D.  Using good jewelry adhesive, glue onto the front of the bottle top.


HINT - If you plan on refilling the bottle, make sure the bottom of your heart clears the bottle so it can be opened


SteamPunk Sweetheart

Steps:

A.  Following manufacturers instructions, coat your heart with the copper base paint.  Let dry at least one hour.

HINT - use disposable gloves when using these paints.  Your manicure will thank you.


B.  Once dry, paint the piece again with the copper paint.  Note:  Only add paint in those areas that you want to react to the patina reactive paint.  While still wet, spray the patina solution as desired.  This reactive process takes at least 48 hours to complete the process.


C.  Once completed, glue steampunk elements as desired.  Adhere to the bottle as described above.

Queen Of The Nile

For this piece, I wanted to recreate an antique look, like something brass that had tarnished after many years.  The VerDay Paints from 10 Seconds Studio makes this easy to accomplish.

Steps:

A.  Following manufacturer's instructions, coat your heart with bronze base paint.  Let dry at least one hour.  Follow the same instructions as above for adding the patina element.

B.  Once dry, apply the gilding adhesive as desired, following instructions on the package.

HINT - to create the look I wanted, I only added gilding adhesive in select areas.  The gilding paper will attach to only the adhesive.


C.  Let the adhesive set, until it becomes tacky - about 20 minutes.  Place the gold gilding paper, gold side down on your piece.  Using disposable gloves, rub into all the nooks and crannies.  Use the brush with the kit, to burnish and remove small flakes that did not adhere.


D.  Add embellishments as desired. Adhere to bottle as described above.

     I love how all these pieces came together.  They would make beautiful perfume bottles as a special gift, fill with water and use drops of food coloring or just leave them empty.  Happy Crafting and thanks for looking!


Wednesday, August 5, 2015

Upcyled Bookends with The Buckle Boutique

MY STORY

     Although I love my e-reader, I am still a fan of my books -- especially my crafting books.  In the midst of spring cleaning I was able to make room to arrange my books.  Instead of going out shopping, I looked around the house and found these old metal bookends.

    Well, they were just not cute enough, so with the products from THE BUCKLE BOUTIQUE here  is how I jazzed them up.

YOUR TURN

     I love radiator screen -- there are so many uses for it and you can get a lot of projects out of one, affordable, sheet.  Trace the opening of your bookend onto the metal screen and cut out.  NOTE:  This is NOT a project for the kids.  The ends are sharp -- use gloves, eye protector and cut over a garbage can.  I used regular scissors but wire snips would probably work better.


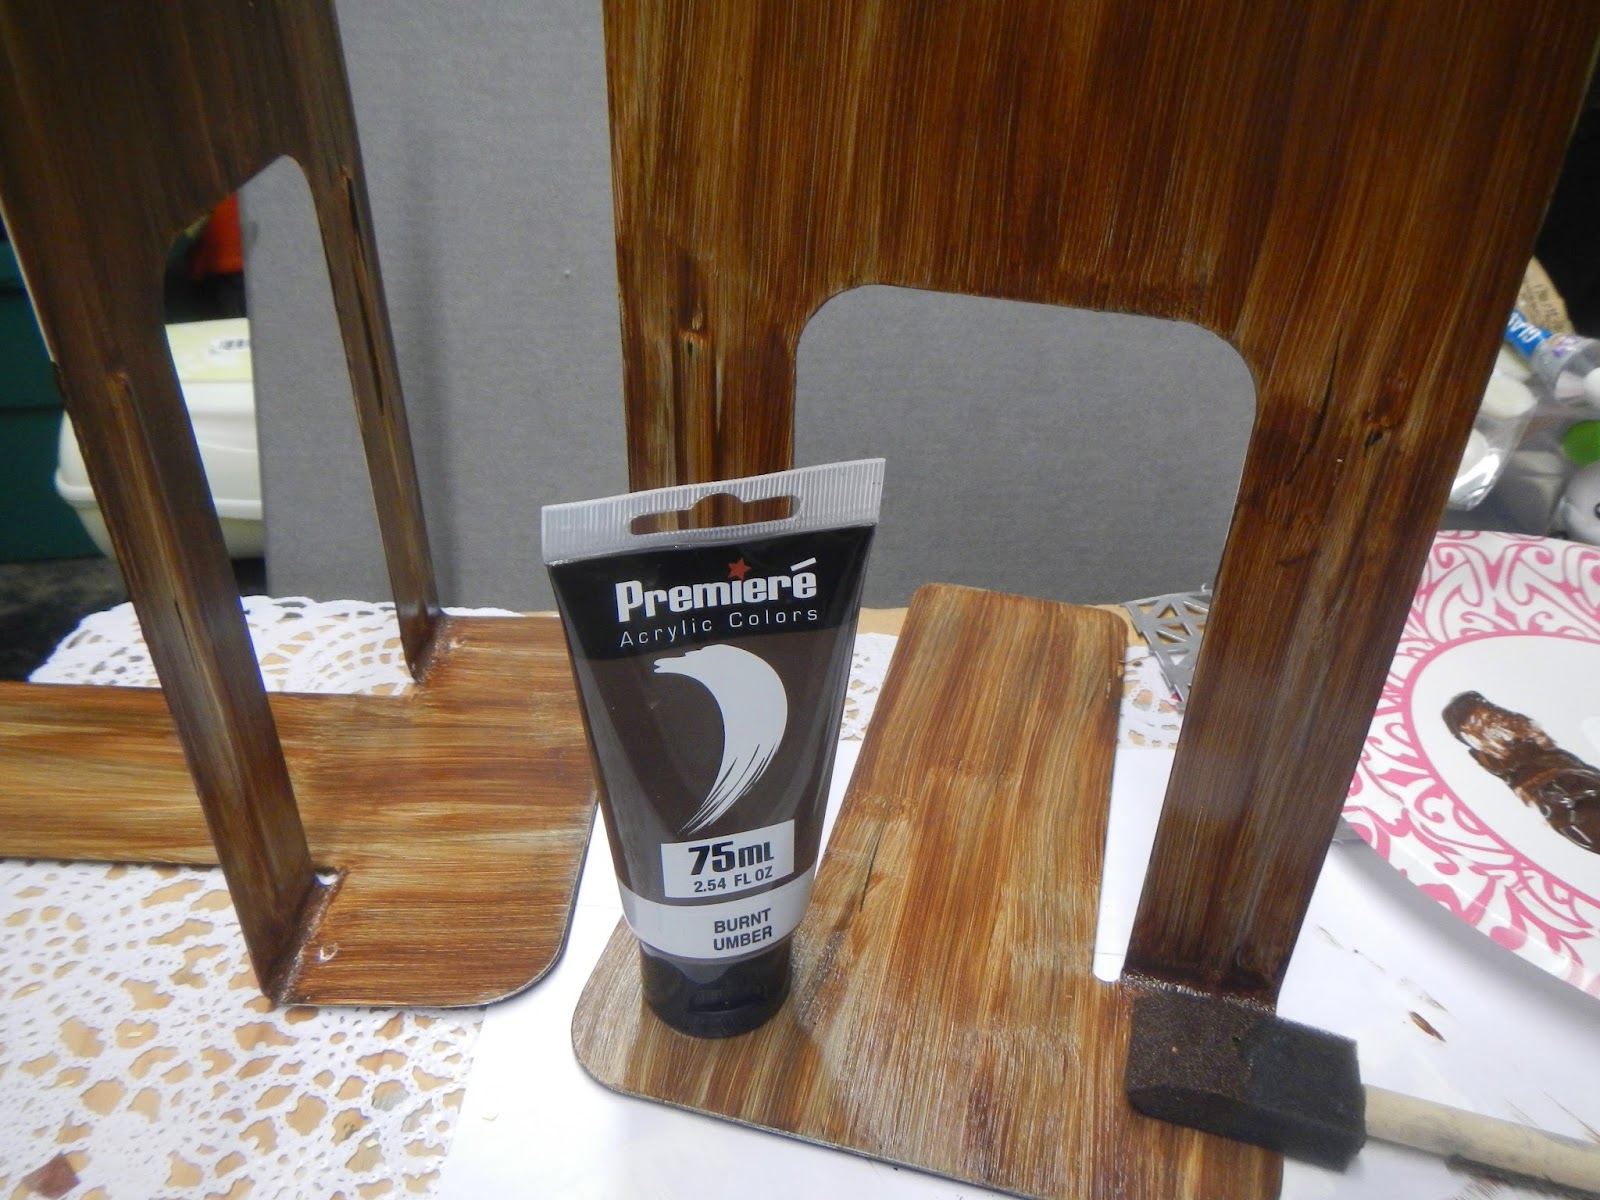
    Paint a base color to cover the black metal -- I used two coats of white acrylic.  Metal paint might work out better, but I liked the end result.

   Once the base color dries, paint two coats of Burnt Umber acrylic paint.  Use a foam brush because it leaves brush marks that mimic wood.  Again, any color would work based on your desired result.

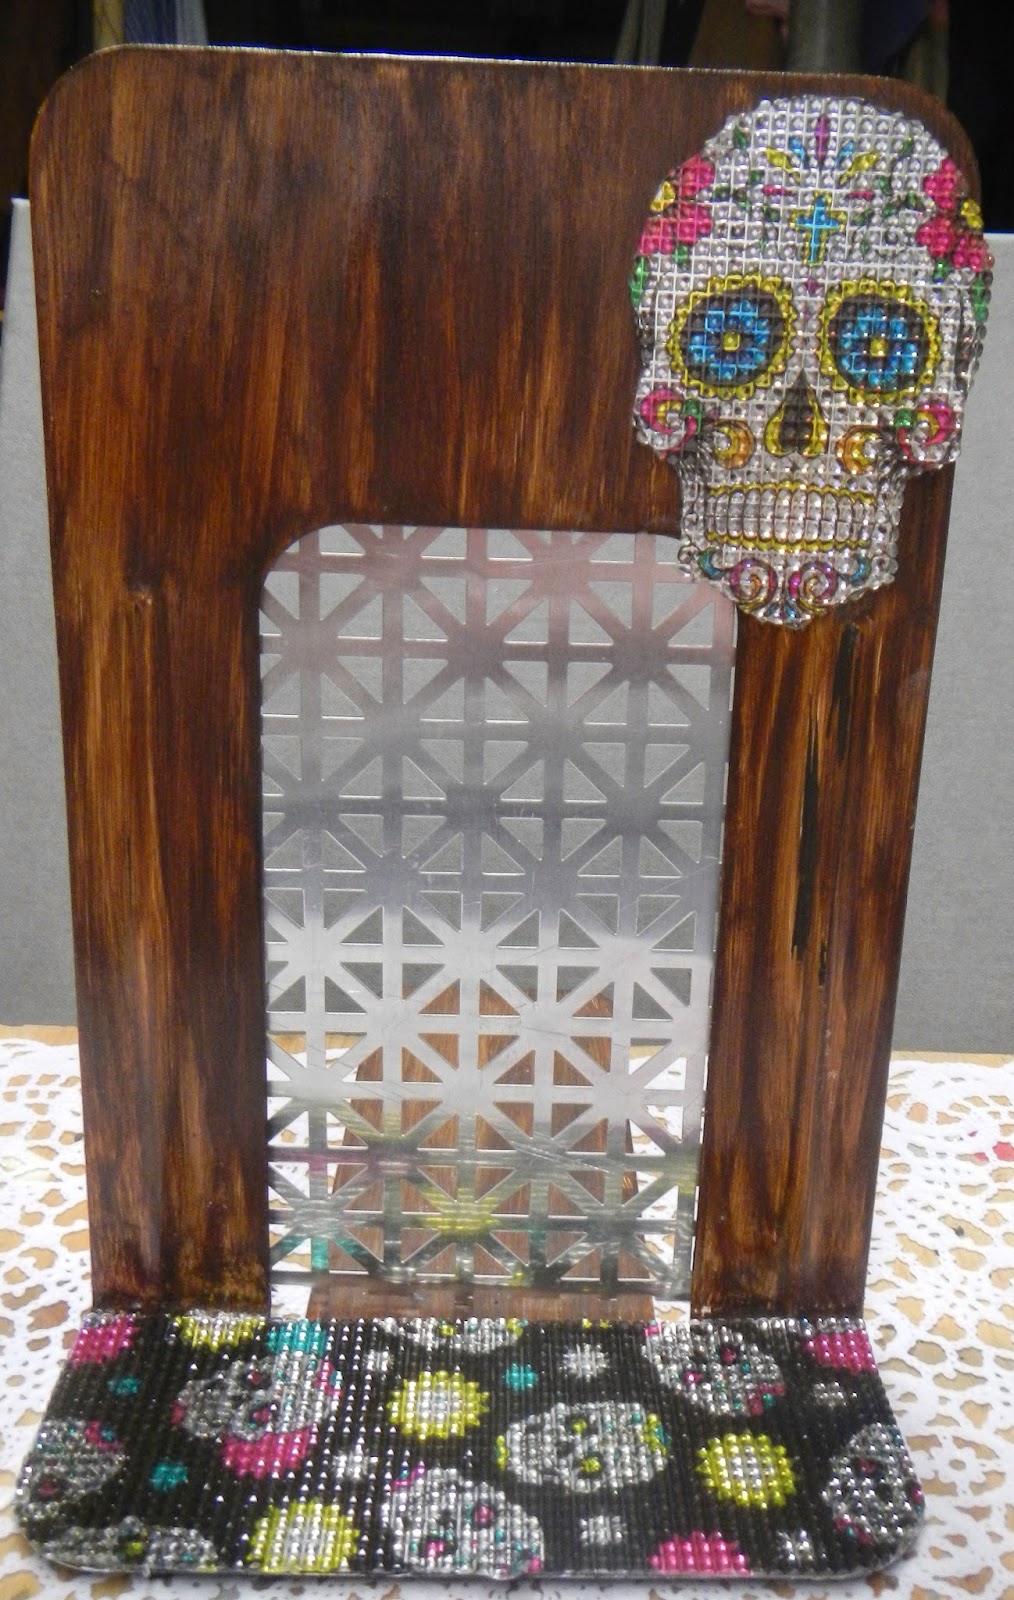
    I love sugar skulls, and The Buckle Boutique has great sheets designed by Marisa Pawelko.  Cut out a medium size skull -- they cut like butter!.  Peel off the backing and place as desired.

   Measure out your base and cut and apply a strip of the smaller skulls.

    Take your cut out radiator screen and glue along the back of the bookend opening.  The ends could be ragged so cover them, on the back, with masking or Washi tape.  And when the light is just right, the sparkles of the rhinestones reflect on to the screen.


   And that's it, I think these new bookends are adorable.


   Another way to use these upcycled bookends would be for an earring/jewelry display.  How cute would this look in your tween's room???


    Happy crafting!!


RhinestoneBorder
Follow The Buckle Boutique at our Blog  //  Facebook  //  Twitter  //  Pinterest
Shop The Buckle Boutique at our Main Store and Etsy
Tips and videos for cutting our rhinestone sticker sheets can be found HERE
Are you a retailer who would like to carry The Buckle Boutique's products in your store?
Please contact us for wholesale pricing information.

Wednesday, March 19, 2014

Decorate To Celebrate Challenge "Spring Decorations"...Around the House Floral Containers


MY STORY

     I love to find items to repurpose in my crafting.  Call me frugal, but I truly enjoy trying to discover more than one way to use something. Or to use it over and over again.

     As I was thinking about Spring Decorations for this Decorate To Celebrate Design Team challenge, while sitting in the Northeast waiting for another snowstorm to descend, I just kept going back to flowers.  I have a garden full of flowers and herbs once the Spring and Summer come back and I love coming up with simple arrangements that would be great for party favors, table settings; something for your nightstand so you can see one beautiful bud in the morning.  I tend to like minimal arrangements, but these ideas can be adapted to any look you like.

    The key is to look for different objects to use as containers.  All my examples are with silk flowers, so I can hardly wait to implement with some real beauties that are currently sleeping under the snow.

YOUR TURN

     While my husband and I were doing some renovating around the house, I kept the doorknobs.  What I loved is that these doorknobs were original to the home, circa 1940 and I fantasized about all the hands that touched it.  I added one stem and I thought it looked very elegant in this setting:


     My son is 19 but for whatever reason I still have baby food jars.   Again, very simple but a grouping would be so cute.


          I had some small mason jars left over from Christmas crafting and even though it is Spring, I liked using some of my fake snow for filler.  Again, use your imagination - fill the jar with marbles or sand or pinecones for the winter.


     Votive candle holders are very affordable and you can purchase them in a large box for very little money.  My examples are very plain and you can spruce them up in a million ways.  Since they are so affordable, imagine tons of them around a table.  Elevate some of them to have different heights.


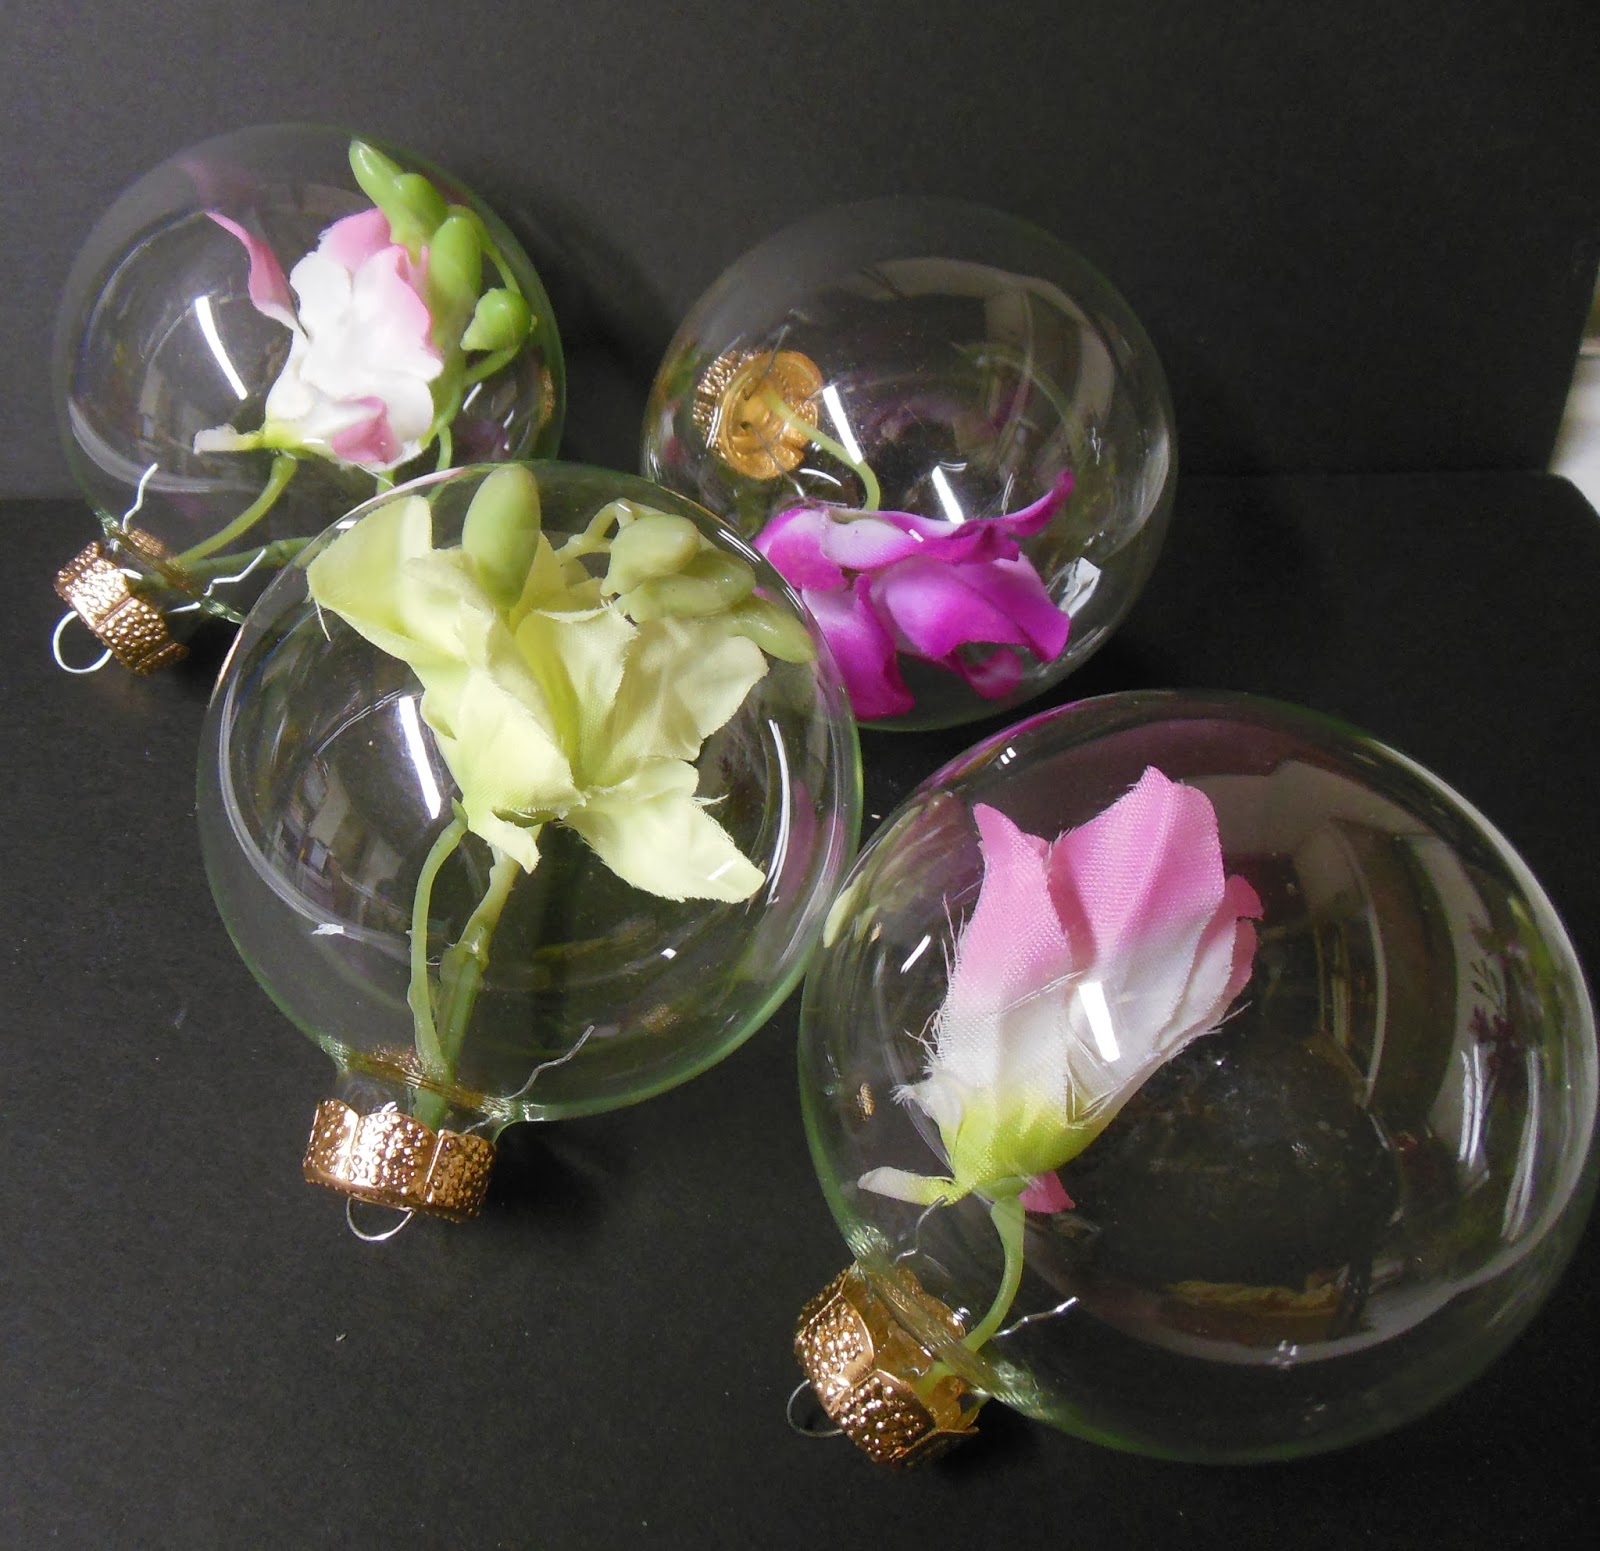
     I'm usually overly enthusiastic when it comes to buying supplies for Christmas crafting.  I had many clear ornaments left over and I thought, why can't I use these?  Be careful with delicate flowers.  With the silk ones, I just pinched them together and fed them through the opening.  You can place a bunch of these in a beautiful springtime bowl or hang from an indoor tree.  Even think about adding some glitter inside the ornament.  I also added them on top of the votive candle holder from above and I think it makes a unique vase.


   I hope I have given you some inspiration on making unique flower containers.  You are only limited by your imagination!