MY STORY
My friend called me in a panic. Her 7 year old's birthday party was in the planning stages and, much to her mother's surprise, she announced she did not want a Frozen party, but she wanted to be a "Sparkly Princess".
With the great products from The Buckle Boutique, I knew I could start helping her out with the little princess's accessories.
The Buckle Boutique has beautiful self-adhesive sheets of rhinestones in a wide array or colors and sizes.
In addition, sparkly embellishments that will get your bling on in no time. They are easy to cut and they stick on almost any surface I've tried. If you are looking for bling, look no further.
Click for The Buckle Boutique website
YOUR TURN
Our little princess was very clear for her choice of decor -- sparkly, sparkly and some more sparkles. I knew her party dress was pink and gold, so this was my jumping off point in terms of colors.
HEADBAND
Our little princess needs to keep her hair neat while having fun at the party. I found an inexpensive, lightweight headband at my favorite local dollar store. In measuring the width, I determined it was about 2 stones in the width and just cut a piece out of the pink stones. I left the bottom empty so it wouldn't irritate her little ears.
Now you can't have just a plain headband, so I added a little flourish. While working on some promotions for a couple of rock bands I work with, I had found this little machine that cuts guitar picks out of anything. And they look like perfect little petals. The machine works basically like a hole punch, so just like that, you have petals to add to your headband. And in about five minutes, you are done!
PARTY FAVORS
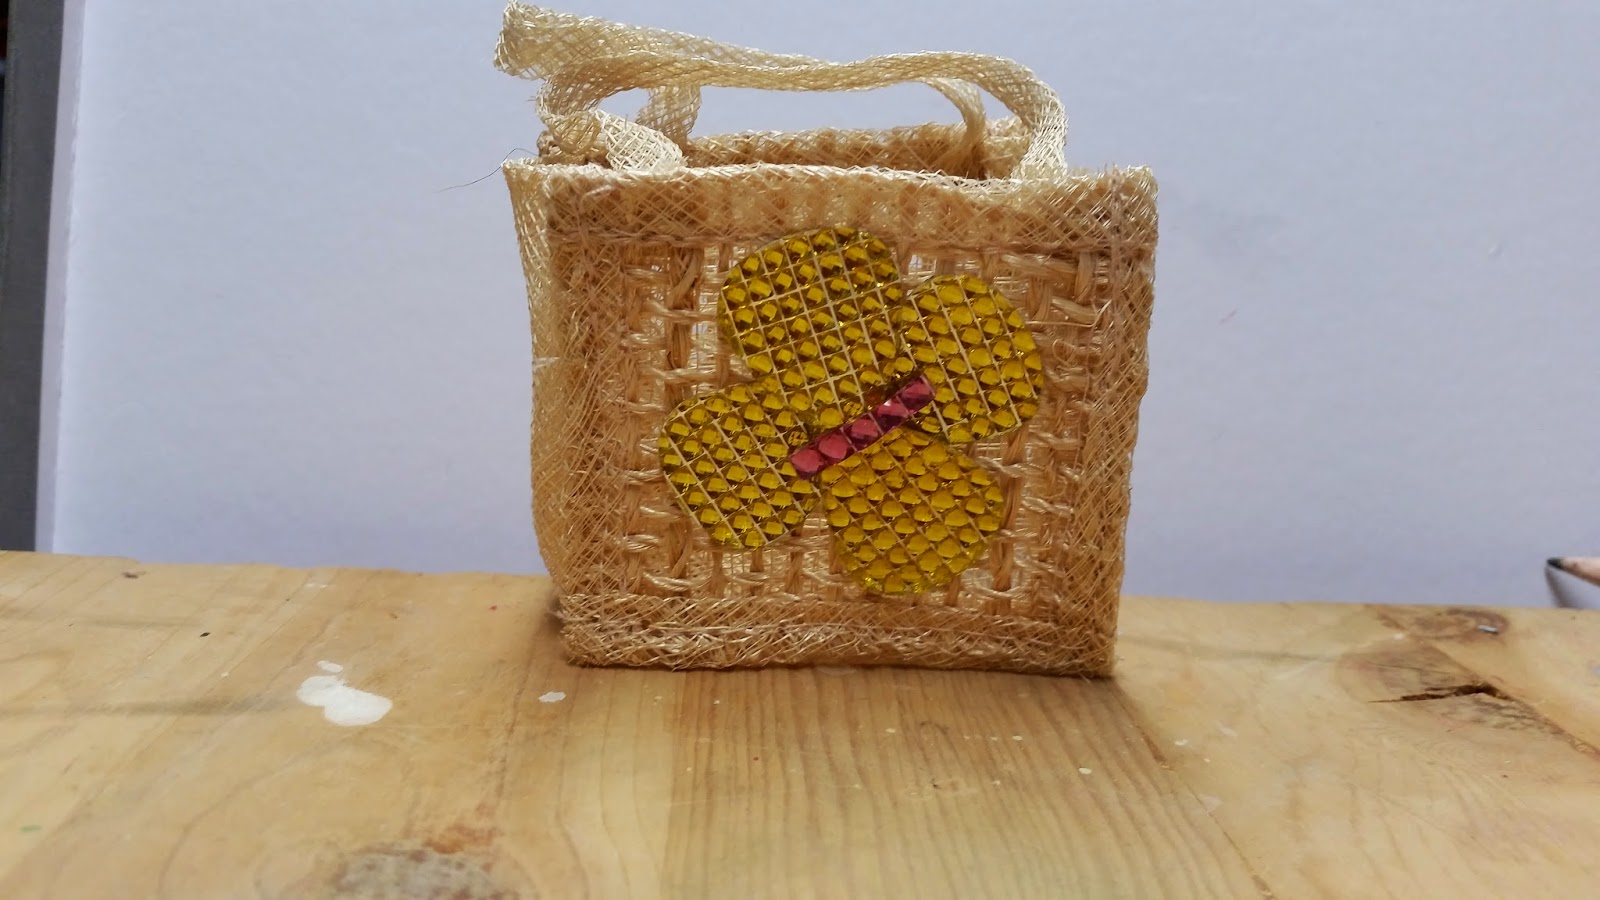
The Mom was planning on giving out little treat bags, and I had a bunch of these burlap mini totes left over. I also like the combo of rustic with bling. Using the guitar pick petals again, it was just that easy to add to the front of the tote.
CLUTCH
A little princess can't go to any party without her lip gloss, so keeping the rustic with bling motif going, I added rhinestones to a burlap makeup bag I had in my stash. Cut out some strips for the "stems" and then add the petals and random shapes to form flowers.
The Princess was delighted with her sparkly items and I think I now will have to add to her collection for the party.
Sunday, January 4, 2015
Saturday, January 3, 2015
Retail Inspiration
MY STORY
Nothing starts my new year off in the right way then a little retail therapy. I'm a big after-holiday shopper and I have been on the search for a print for our newly renovated bathroom. While perusing the aisles of my local Bed Bath & Beyond, not only did I find the perfect bathroom print, I was inspired by their wall decor department. For both clearance and regular priced items, I was impressed by their collection and quality. I was inspired by so many items, I had to share.
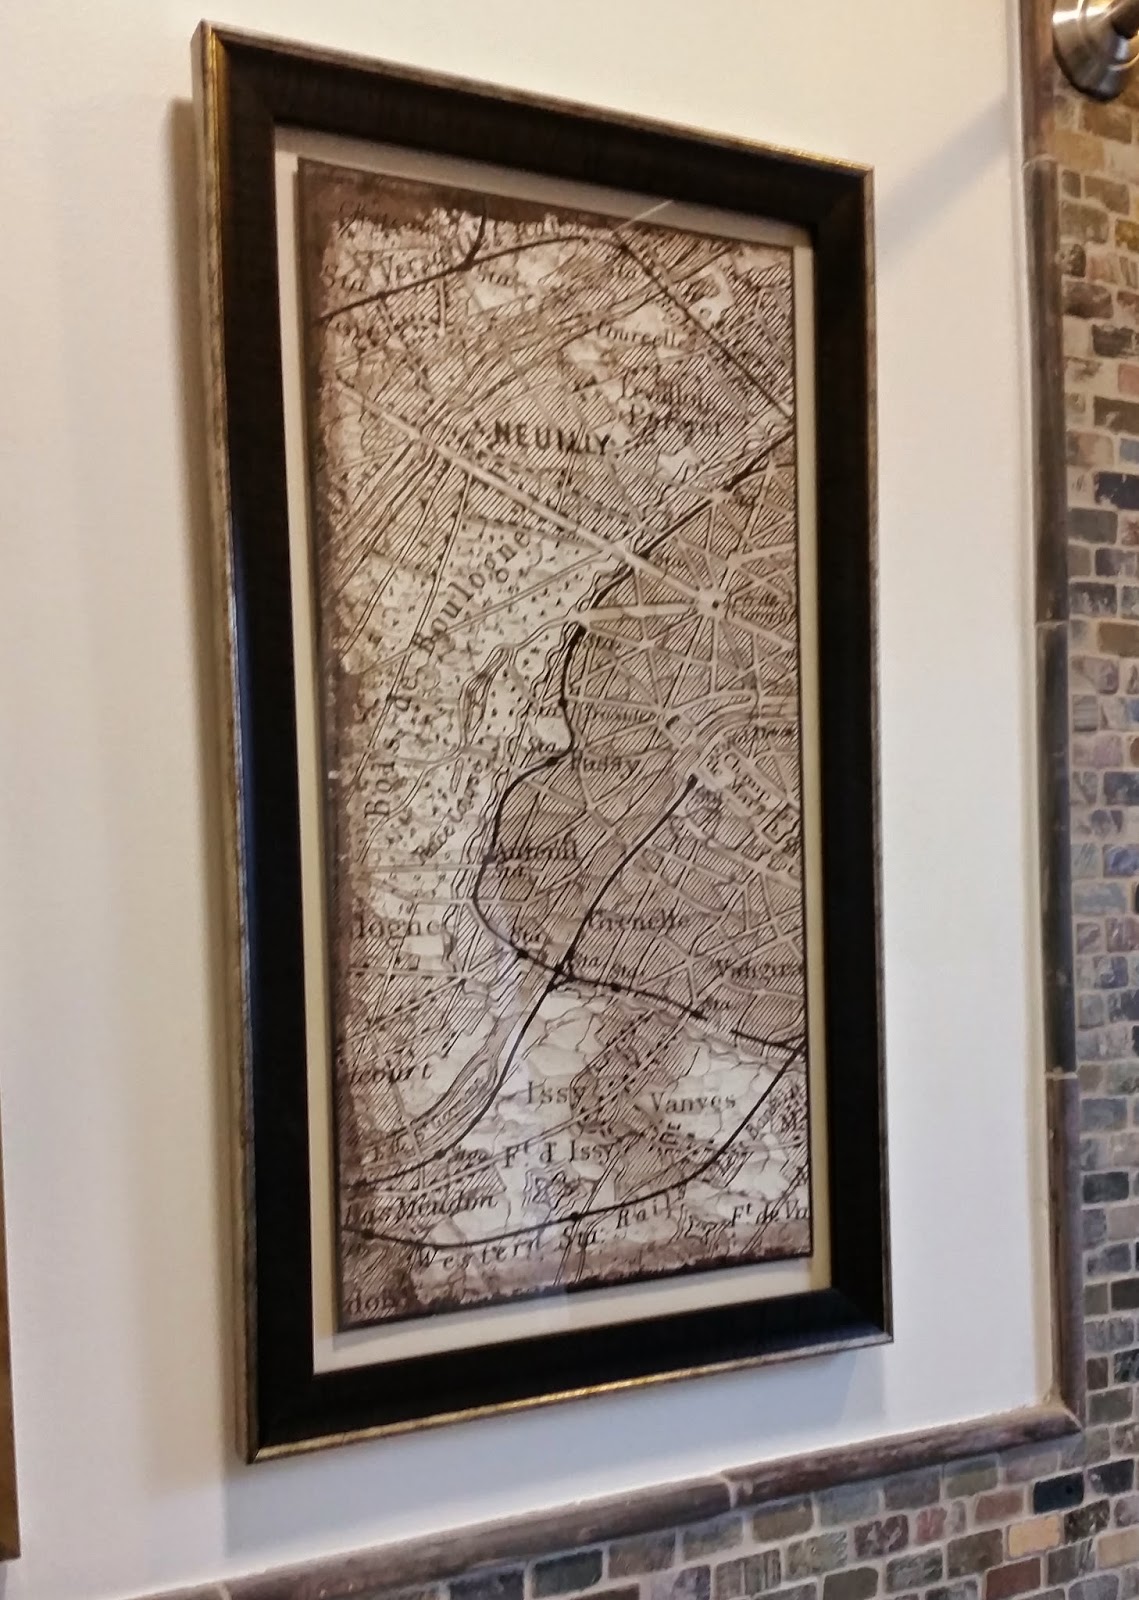
But first of all, our beautiful Parisian print for our new bathroom:
Photography/"Negative" printing / pops of color:
I loved these sets - 7 pieces of coordinated wall art that you can either use separately or as a grouping. Great opportunity to play with color and patterns.
Marquee Lights:
There was a huge selection of marquee lights at Bed Bath & Beyond. Great items and reasonable pricing. I'm still a big fan of this trend and created a faux marquee sign that sits along with some of my son's childhood artwork. Might have to add to my collection after seeing these signs.
Dimensional Canvas:
What a great way to showcase found objects and the dimensional bike on the photograph is brilliant.
Local Maps/Vintage:
As a born and raised Long Islander, I was drawn to this print and it has made me go on the hunt for more of this style.
Also thought this has some great ideas for taking existing maps and giving them a vintage vibe.
Wood/Pallet Projects:
The use of color and placement of these items was just gorgeous...I definitely think I'm going back for one of these!
Mixed Media Color/Canvas:
The use of color was so beautiful and inspirational. As a big music fan, the guitars really struck a "chord" with me!
Shadowbox:
The simplicity of the monochromatic flowers was so pretty and makes me think of wedding gifts. And the second shadowbox had several different examples with motivational savings on the glass itself, so many ideas come to mind for this one.
Don't forget to support your local big & small retailers ....they need your business and you never know what will inspire you.
Nothing starts my new year off in the right way then a little retail therapy. I'm a big after-holiday shopper and I have been on the search for a print for our newly renovated bathroom. While perusing the aisles of my local Bed Bath & Beyond, not only did I find the perfect bathroom print, I was inspired by their wall decor department. For both clearance and regular priced items, I was impressed by their collection and quality. I was inspired by so many items, I had to share.
But first of all, our beautiful Parisian print for our new bathroom:
Photography/"Negative" printing / pops of color:
Coordinated Canvas:
I loved these sets - 7 pieces of coordinated wall art that you can either use separately or as a grouping. Great opportunity to play with color and patterns.
Marquee Lights:
There was a huge selection of marquee lights at Bed Bath & Beyond. Great items and reasonable pricing. I'm still a big fan of this trend and created a faux marquee sign that sits along with some of my son's childhood artwork. Might have to add to my collection after seeing these signs.
Dimensional Canvas:
What a great way to showcase found objects and the dimensional bike on the photograph is brilliant.
Local Maps/Vintage:
As a born and raised Long Islander, I was drawn to this print and it has made me go on the hunt for more of this style.
Also thought this has some great ideas for taking existing maps and giving them a vintage vibe.
Wood/Pallet Projects:
The use of color and placement of these items was just gorgeous...I definitely think I'm going back for one of these!
Mixed Media Color/Canvas:
The use of color was so beautiful and inspirational. As a big music fan, the guitars really struck a "chord" with me!
Shadowbox:
The simplicity of the monochromatic flowers was so pretty and makes me think of wedding gifts. And the second shadowbox had several different examples with motivational savings on the glass itself, so many ideas come to mind for this one.
Don't forget to support your local big & small retailers ....they need your business and you never know what will inspire you.
Labels:
Bed Bath and Beyond
,
DIY
Saturday, December 27, 2014
Accidental Art
MY STORY
Each spring, my husband and I get small American flags from our local crafts or dollar store and place them throughout our garden. As the parents of a US Marine we love to show our support for all our troops.
As winter approaches, we remove the flags and dispose of them at the local VFW where they have a bin that collects old / torn flags as it is considered disrespectful to just throw out American flags.
So when the holiday season arrives, we are ready to bring out the lights and reindeer and this season, we discovered that we missed one of the flags. It was buried under a couple of months of collected leaves and garden debris. And although it looked a little sad, I thought it looked amazing, like a flag that had been around for years.
Now remember this was a flag found at the local store and was a bright and shiny red, white and blue flag. It had aged beautifully under the natural changes in our garden.
We have patriotic art in our living room and thought this was a happy accident and I wanted to include this in our collection. Visiting my craft store for after Christmas savings, I found a great floating frame (and it was buy one, get one!).
I very carefully put the flag between the two pieces of glass and have a wonderful new art piece to add to our vintage Americana theme.
YOUR TURN
As we start the new year, keep your eyes and heart open to the possibilities that art and inspiration is so easily found and will consistently rejuvenate your spirits.
The EVERYDAY MUSE wishes you and your loved ones a peaceful, healthy and crafty 2015! Thank you all for being a part of my creative journey.
Each spring, my husband and I get small American flags from our local crafts or dollar store and place them throughout our garden. As the parents of a US Marine we love to show our support for all our troops.
As winter approaches, we remove the flags and dispose of them at the local VFW where they have a bin that collects old / torn flags as it is considered disrespectful to just throw out American flags.
So when the holiday season arrives, we are ready to bring out the lights and reindeer and this season, we discovered that we missed one of the flags. It was buried under a couple of months of collected leaves and garden debris. And although it looked a little sad, I thought it looked amazing, like a flag that had been around for years.
Now remember this was a flag found at the local store and was a bright and shiny red, white and blue flag. It had aged beautifully under the natural changes in our garden.
We have patriotic art in our living room and thought this was a happy accident and I wanted to include this in our collection. Visiting my craft store for after Christmas savings, I found a great floating frame (and it was buy one, get one!).
I very carefully put the flag between the two pieces of glass and have a wonderful new art piece to add to our vintage Americana theme.
YOUR TURN
As we start the new year, keep your eyes and heart open to the possibilities that art and inspiration is so easily found and will consistently rejuvenate your spirits.
The EVERYDAY MUSE wishes you and your loved ones a peaceful, healthy and crafty 2015! Thank you all for being a part of my creative journey.
Labels:
DIY
,
patriotic art
Wednesday, December 10, 2014
Design Team Challenge @ Decorate To Celebrate - A Message In A Bottle
MY STORY
It has been such a fun year being on the Decorate to Celebrate Design Team. If you have not checked out their blog, yet, you must! Great ideas for all your celebration needs. And every other week they have challenges that you can show off your creativity and win prizes and recognition. Decorate To Celebrate
As the new year approaches, I'm not much of a resolution maker -- my house is still a tad messy; those stubborn 20 pounds never seem to go away and I have not been inside a gym since I don't know when. So, I tend to be more of a positive affirmation kind a person.
Over the summer, I saw these adorable messages in a bottle at The Paper Source website. So for the New Year, I came up with my version. My message in a bottle contains a wish for whomever opens the bottle. I'm thinking these would be adorable at your New Year's Eve dinner, or for your family on New Year's Day.
YOUR TURN
Any glass container works well - think mason jars, jelly jars, wine bottles. I had accumulated a ton of Saki bottles....no I did not drink them all at one time. They are a pretty shape, and although the label is pretty as is, it was also easy to remove.
Fill up the container 1/2 way with fake snow -- for all these supplies, keep your eyes open right as Halloween is winding down....sales abound!
Grab up holiday supplies that you have -- I always over buy so I am usually left with goodies from holiday to holiday. HINT: I tend to buy supplies in similar color families so I can always use together. For this example, I'm following a black, white, gold, silver palette.
Again, from The Paper Source, they had these wonderful affirmations the size of a place card. Adhere to the BACK of your desired paper. You can judge how big your paper should be by holding along the side of your container.
Roll up with the RIGHT side of your paper on the outside. Wrap with ribbon -- I found these ribbon ornament hangers at the dollar store - perfect size and color for this project. Place inside your container.
And of course, I added some tinsel glitter for a little more bling.
I still like the look of chalkboard and found these labels and markers at The Container Store. Just the right size! Write and doodle however you want. HINT: Treat the chalk marker like paint.....it takes a little bit to dry so be careful not to smudge.
Glue or tie ribbon around the top, I added some extra embellishment on the outside. I also had gift stickers from I don't know how many holidays ago and added to the bottom of the container.
And the mini ornaments make a perfect stopper!!!
Have fun and share positive reinforcements with all the wonderful people in your life.
Here's to a blessed New Year filled with love, gratitude, peace, joy and CRAFTS!
It has been such a fun year being on the Decorate to Celebrate Design Team. If you have not checked out their blog, yet, you must! Great ideas for all your celebration needs. And every other week they have challenges that you can show off your creativity and win prizes and recognition. Decorate To Celebrate
As the new year approaches, I'm not much of a resolution maker -- my house is still a tad messy; those stubborn 20 pounds never seem to go away and I have not been inside a gym since I don't know when. So, I tend to be more of a positive affirmation kind a person.
Over the summer, I saw these adorable messages in a bottle at The Paper Source website. So for the New Year, I came up with my version. My message in a bottle contains a wish for whomever opens the bottle. I'm thinking these would be adorable at your New Year's Eve dinner, or for your family on New Year's Day.
YOUR TURN
Any glass container works well - think mason jars, jelly jars, wine bottles. I had accumulated a ton of Saki bottles....no I did not drink them all at one time. They are a pretty shape, and although the label is pretty as is, it was also easy to remove.
Fill up the container 1/2 way with fake snow -- for all these supplies, keep your eyes open right as Halloween is winding down....sales abound!
Grab up holiday supplies that you have -- I always over buy so I am usually left with goodies from holiday to holiday. HINT: I tend to buy supplies in similar color families so I can always use together. For this example, I'm following a black, white, gold, silver palette.
Again, from The Paper Source, they had these wonderful affirmations the size of a place card. Adhere to the BACK of your desired paper. You can judge how big your paper should be by holding along the side of your container.
Roll up with the RIGHT side of your paper on the outside. Wrap with ribbon -- I found these ribbon ornament hangers at the dollar store - perfect size and color for this project. Place inside your container.
And of course, I added some tinsel glitter for a little more bling.
I still like the look of chalkboard and found these labels and markers at The Container Store. Just the right size! Write and doodle however you want. HINT: Treat the chalk marker like paint.....it takes a little bit to dry so be careful not to smudge.
Glue or tie ribbon around the top, I added some extra embellishment on the outside. I also had gift stickers from I don't know how many holidays ago and added to the bottom of the container.
And the mini ornaments make a perfect stopper!!!
Have fun and share positive reinforcements with all the wonderful people in your life.
Here's to a blessed New Year filled with love, gratitude, peace, joy and CRAFTS!
Subscribe to:
Posts
(
Atom
)