Showing posts with label Decorate to Celebrate blog. Show all posts

Wednesday, May 27, 2015

Rhinestone Table Numbers for your next party

MY STORY

     It's Decorate To Celebrate Challenge Time again!

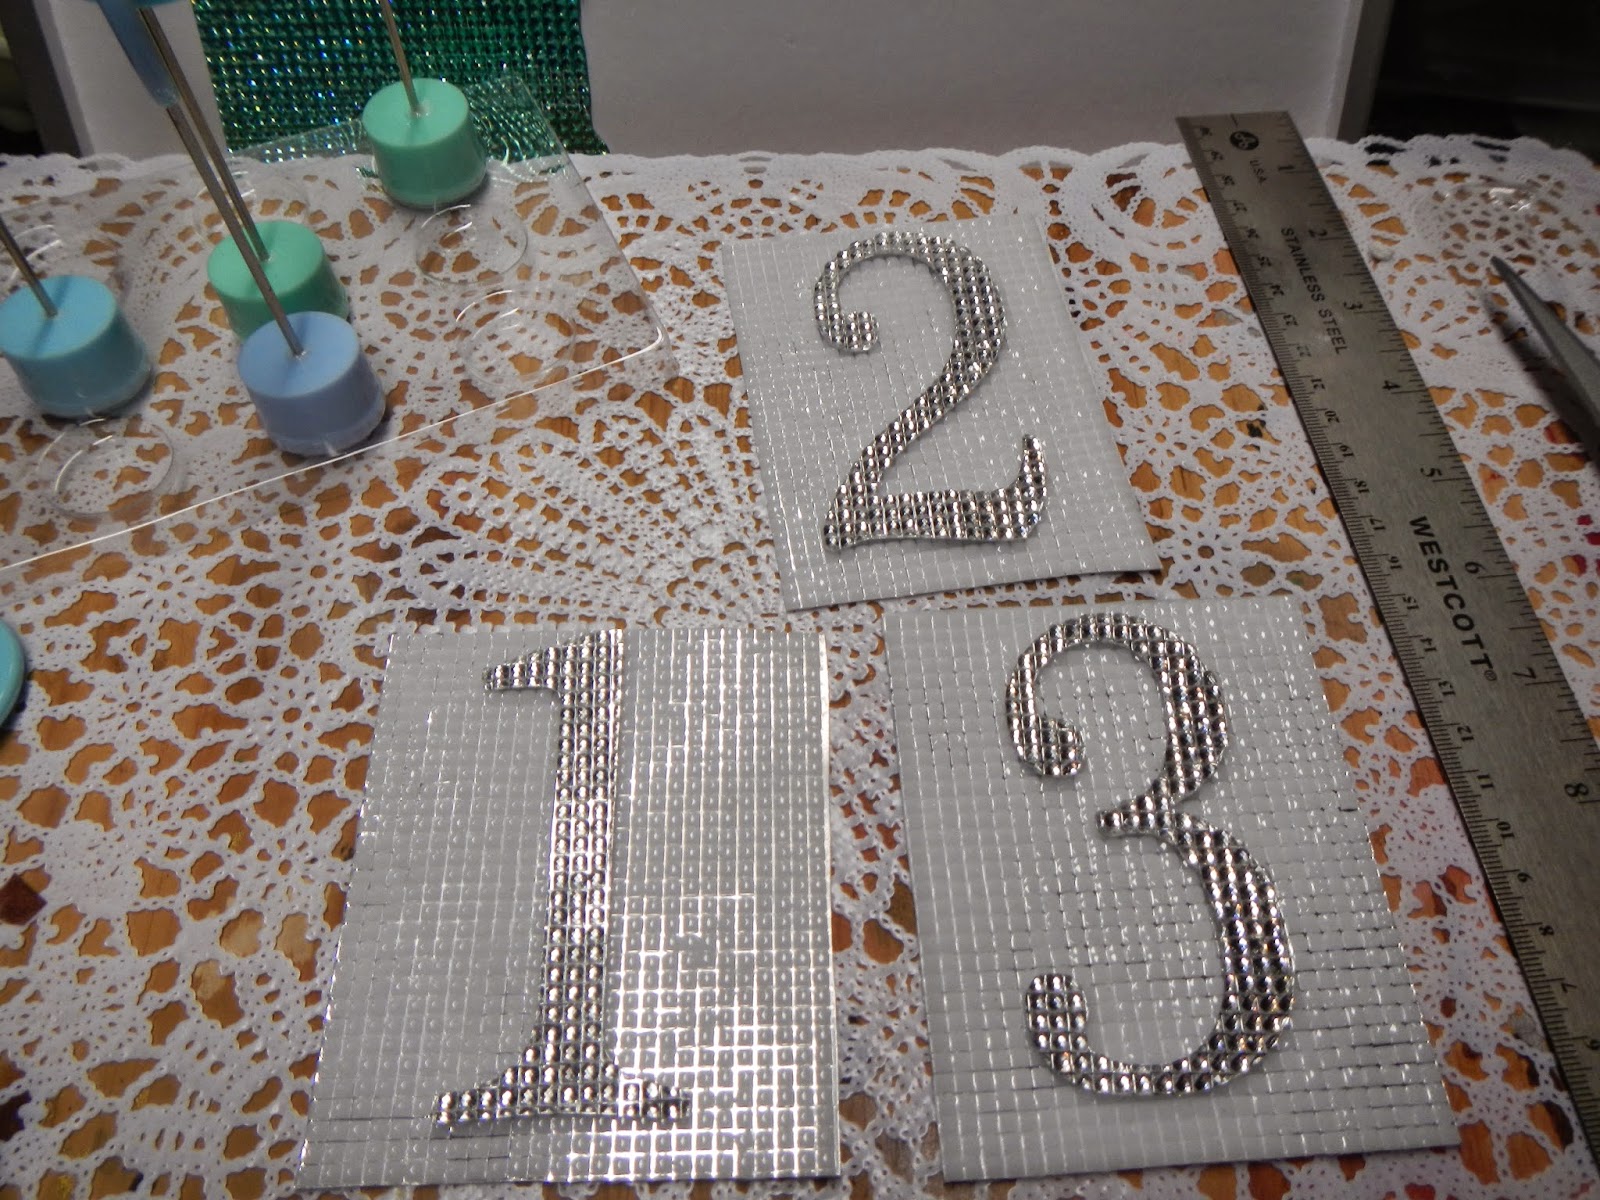
     I am still old school in some aspects, and in my crafting world, I still work only with scissors.  There are several die cutting machines out there but I have yet to take that plunge!  So I was so happy to use these pre-cut numbers from THE BUCKLE BOUTIQUE.  I also had some leftover baby-themed table placecard holders.  So with some of the Buckle Boutique project, I was able to reuse these for a wedding themed table number holder.

     With all of the great product from The Buckle Boutique, you can easily customize this idea for any color palette the bride wants!  This adds a  nice blingy touch to your wedding.  For this example, the bridesmaids were wearing teal dresses and The Buckle Boutique had just what I was looking for!  And the pre-cut numbers made quick work of this project.

YOUR TURN

    You will need table number holders, pre-cut rhinestone numbers, complementary rhinestone sticker sheets for the backing and for wrapping the holders.


     I felt that the white rhinestone sticker sheet was the best complementary color to use to back the silver numbers.  Cut out into even pieces.  Adhere your numbers right onto the white.  NOTE:  do not pull off the adhesive backing on your white sheet.  You will need to keep it thicker to stand up.  Also, you would repeat all these steps for the backing if you need to see all around the holder.


    Trace the base and top of the holder and apply your rhinestone sheet.    I also painted the inside of the base as the baby blue color wasn't part of the palette.


    And that is it!  Hope you have fun crafting and don't forget to check out Decorate To Celebrate Blog and the great products available at The Buckle Boutique.  


RhinestoneBorder
Follow The Buckle Boutique at our Blog  //  Facebook  //  Twitter  //  Pinterest
Shop The Buckle Boutique at our Main Store and Etsy
Tips and videos for cutting our rhinestone sticker sheets can be found HERE
Are you a retailer who would like to carry The Buckle Boutique's products in your store?
Please contact us for wholesale pricing information.

Wednesday, April 15, 2015

Party Mugs at Decorate To Celebrate

MY STORY

      It's challenge time at Decorate To Celebrate!  Check out their page for great ideas for your party and gift giving projects.  DECORATE TO CELEBRATE Blog.

    I was asked again to come up with a fun party idea for a friend's daughter who is too old for a FROZEN party.  I came up with some ideas on decorating mugs which I thought was easy for any age to do and just by changing up some of the elements, there are many ways to dress up basic dollar store mugs.  NOTE:  These examples are using the Sharpie brand permanent markers.  They can only be washed by hand.  For mugs that can be put into the dishwasher, use ceramic paint or oil based paint and bake in an oven for permanence.  There are many YouTube videos or google info on these paints for the best results.

YOUR TURN

   Keep your eye out for sales at any retailer that sells plain mugs.  I found these at my reliable neighborhood dollar store.  Before applying any ink, wash the mugs and then wipe with rubbing alcohol.  I got rubbing alcohol wipes at the drugstore and they are perfect.

   For this first example, pick two shades  of pen and stickers.  I like these chunky stickers I bought at Michaels.  You can choose whatever stickers you like, but these work well because they sit above the surface.


   Place your stickers as desired and then simply create dots around the letters with your Sharpie.  Concentrate the most dots by the sticker edges and lessen as you go out.  Remove the stickers and you have your first, party monogrammed mug.


   Using the same concept, I was playing around with a different color and stickers and thought this would make a cute mug to keep out for Santa on Christmas Eve.

   I am getting obsessed with gilding.  Martha Stewart has a line of products at Michaels that make it so easy to use this gold leafing process on many surfaces -- more on this application in future blogs!

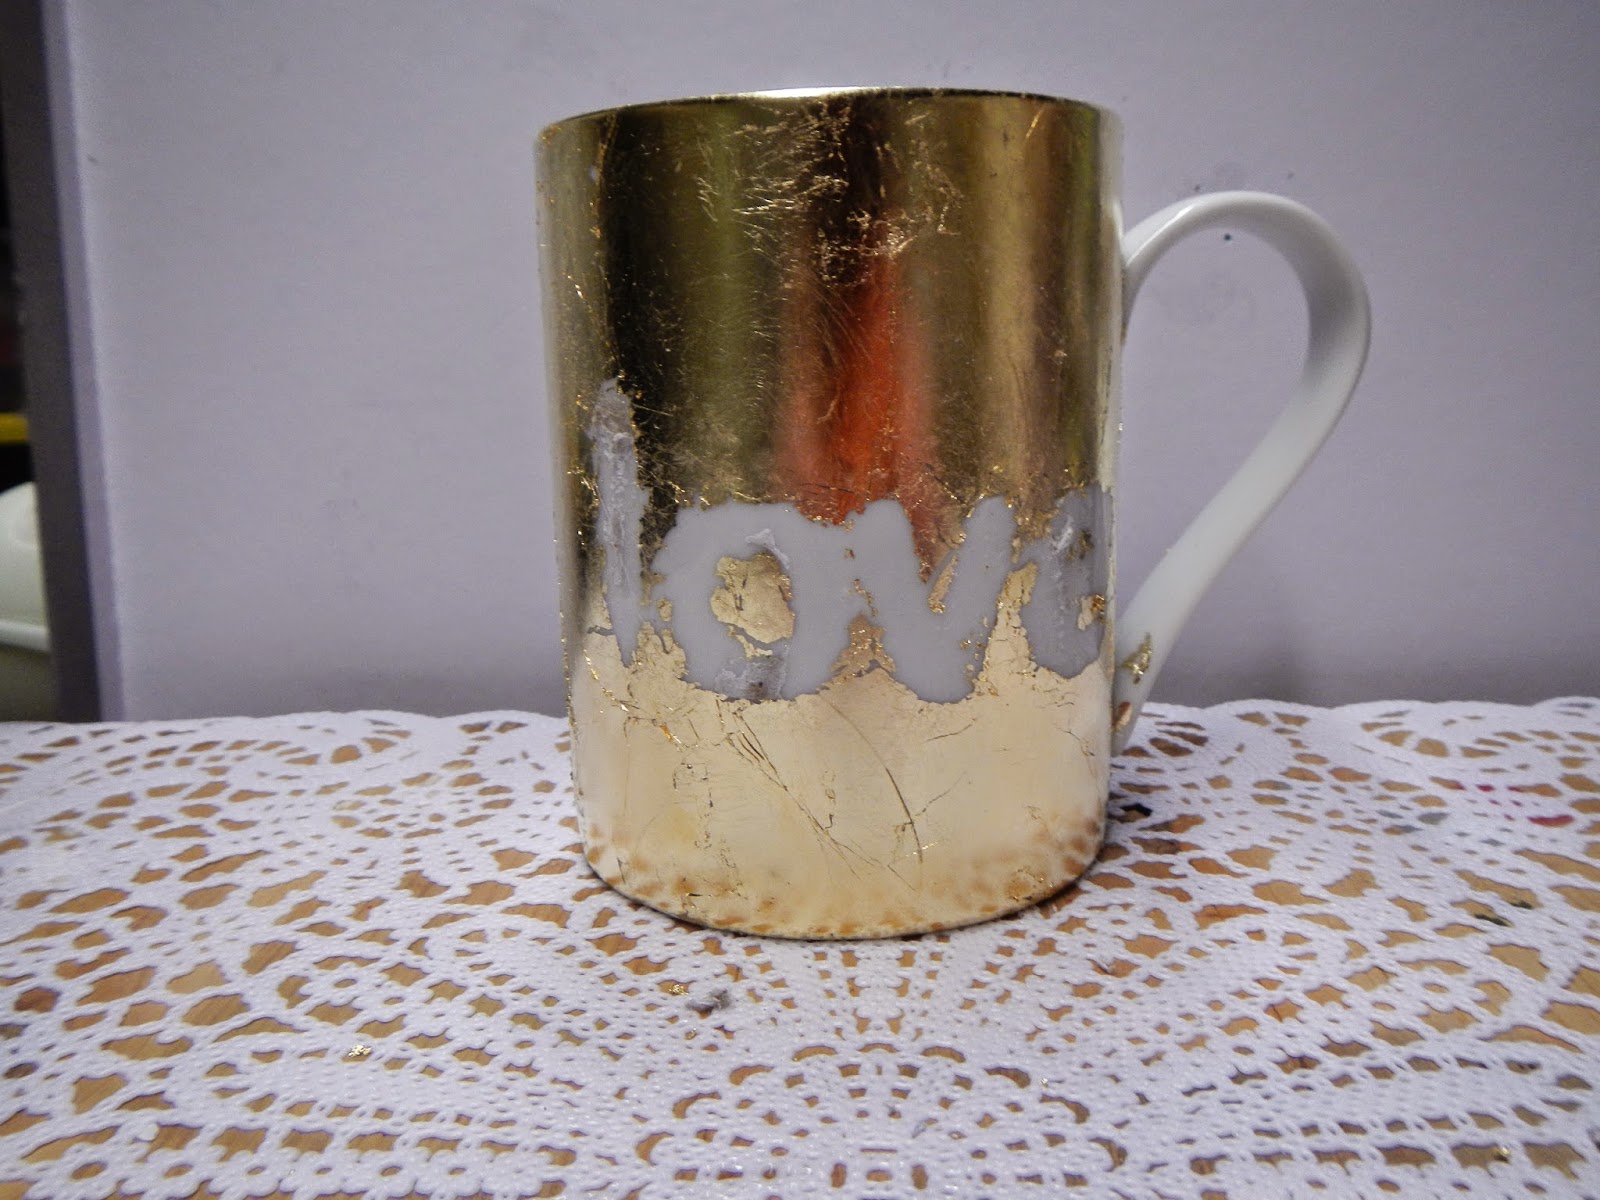
   For this example, place your stickers as desired.  I used "l o v e" as I thought, if this worked out well, it might be a fun use for a wedding shower, wedding party, etc.


   Apply a thin layer of gilding adhesive on the surface, including the stickers.  Let sit for 1/2 hour or so.  The adhesive will be clear but sticky.

   Remove a gold leaf sheet from the package and place gently over your mug.  Rub it into the surface with your fingers.  Depending on the surface, you may need more than one sheet.  Let dry and then rub with a brush and the tiny bits that didn't stick will fall off.  HINT:  Do this over a garbage pan.  I learned the hard way, trust me!


  You can leave as is

  Or remove the letters for a different look.  Might look nice on a table to do a combination of these effects.

   I also tried just gold leafing the letters, using the same steps as above.  I liked the way this looked too.  And then I combined with the dots process in black ink and I loved this color combination.


  And then I removed the letters again for another different look.

  There are so many combinations and ways to experiment.  You can do this for baby showers, any holiday and they can be either whimsical or dramatic.  It all comes down to your ink color, type of stickers, etc.  Have fun crafting!!


Wednesday, February 18, 2015

Valentines Card & Candy Bag

MY STORY

     It's Decorate To Celebrate time again.  I had seen some Pinterest boards showing 3D ideas and after a visit to my local drugstore, here is what I came up with.

YOUR TURN

   What you will need:

  • small sandwich bag
  • candy of your choice, my sample relates to those yummy gummy candies
  • scrap paper
  • computer program (I used Microsoft Publisher)
  • ribbon
  • cardstock
  • hole punch


   Using a program like Microsoft Publisher create your graphic.  I find Publisher really easy to use and since I have yet to master drawing, it helps me accomplish what I want to do.  Create one graphic using the size of your cardstock, then copy and paste onto a smaller template for your gift bag.  There are plenty of books and YouTube videos on Publisher or any other software program you want to use.


   For the card, simply cut out your graphic, apply to background paper and adhere to your cardstock.  The image of the fishing pole was the perfect size to add the real fish.  


   For the candy bag, add your candy and seal up the bag.  Take another scrap of your background paper and measure so it covers the top of your baggie.  Measure so it covers 1/2 of the front and 1/2 of the back of your bag.  Use a hole punch and punch through the paper and bag.  Don't punch too close to the top - it will rip when you insert your ribbon.


   Taking a small piece of ribbon thread through the hole.  You may need to open up the hole a little bit to get the ribbon through completely.

   Using your smaller graphic, add to solid cardstock and add to the front of your card. 


 This is a "sweet" project for kids gifts, and think of how many options you can come up with.  Think of those little hearts.  Using different wording and graphics, this idea can be used in many different ways.


Wednesday, February 4, 2015

Key to my Heart Gift Box

MY STORY

     It's time for another design challenge at Decorate To Celebrate!  Make sure you visit their blog for great crafty inspirations and a chance to submit your own designs for prizes.  For this challenge, I wanted to come up with a fun way to create a gift box to give a goodie to your loved one.  This idea can be used for any size box you may have at home, you would just need to adjust the size of your paper, heart, etc.

     Have fun and I hope you can incorporate some of these ideas into your Valentines gifting!

YOUR TURN

    For this project you will need:


  • empty box - any size
  • acrylic paint / foam brush
  • coordinating paper 
  • Rhinestone or other blingy material to create your heart.  Since I can not draw freehand I pulled up some heart templates online and used as my guide.  And nothing is easier to use than self adhesive rhinestone sheets from  The Buckle Boutique. 
  • Key -- you can use old keys that you may have around the house.  I found these great keys in the clearance bin @Michaels.   I wanted kind of an old fashioned/shabby look and these worked perfectly.
  • Ribbon scrap
     Paint the sides of your box with paint color of your choice.  I tend to pick the paper I want to use first and then pick a complementary paint.  Set aside to dry.


     Using your heart template, cut out the material you are using for your heart.  


     I was looking for a little bit of a distressed look, so I removed some of the rhinestones to make it look a little imperfect.

    Cut out your paper to fit the top of your box.  Adhere your rhinestone heart, your key to the paper and glue on to box top.

   Add a piece of ribbon and that's it.  You have a beautiful box to give your special someone that special something.