Wednesday, January 29, 2014

Operation Write Home - Crafting For A Cause

MY STORY


     There are many charities I am honored to support each year.  But I have been looking for a way to actually give more of me, my talents or time.  And I am happy to say I have found the perfect match!

     As the Mama of a US Marine Corps Lance Corporal stationed overseas I know how difficult it is for him to send a note on special occasions -- yes there is Facebook and SKYPE -- but there is nothing like getting a card on your birthday or Christmas.  And for so many of our troops it is just not possible to pop into a Hallmark store and pick the perfect card.

     And since I'm addicted to all things paper, how happy was I to find Operation Write Home!  Operation Write Home has sent over one million handmade greeting cards to deployed service members around the world.  As they say, "There's no card store in Kabul or Baghdad".

    Of course you can donate but they are also looking for people to create all occasion cards.  There are some restrictions but they have a great facebook / web / blog site.  You can even get a free rubber stamp for the back of your cards!  You can send cards filled out with words of support and gratitude to help them feel as special as they should as they are serving our country in lands far away from home.

YOUR TURN

     Please think about putting some of your pent-up creative talent to good use!!!  This is a great project for you to do together with:


  • Your girlfriends -- get a couple of bottles and some basic art supplies and have fun with it!
  • Your boy scout / girl scout troops -- this would be fun for the young men and women in the scout system to support our heroes
  • Church / school groups -- hey teachers this would be a fun project for those busy little hands!
There is great info on their blog and website and lots of fun and free items you can get to inspire you.

OPERATION WRITE HOME
www.operationwritehome.org


     Wouldn't you like to make the day of these hardworking heroes?


Wednesday, January 22, 2014

Valentines Treat Bags

MY STORY

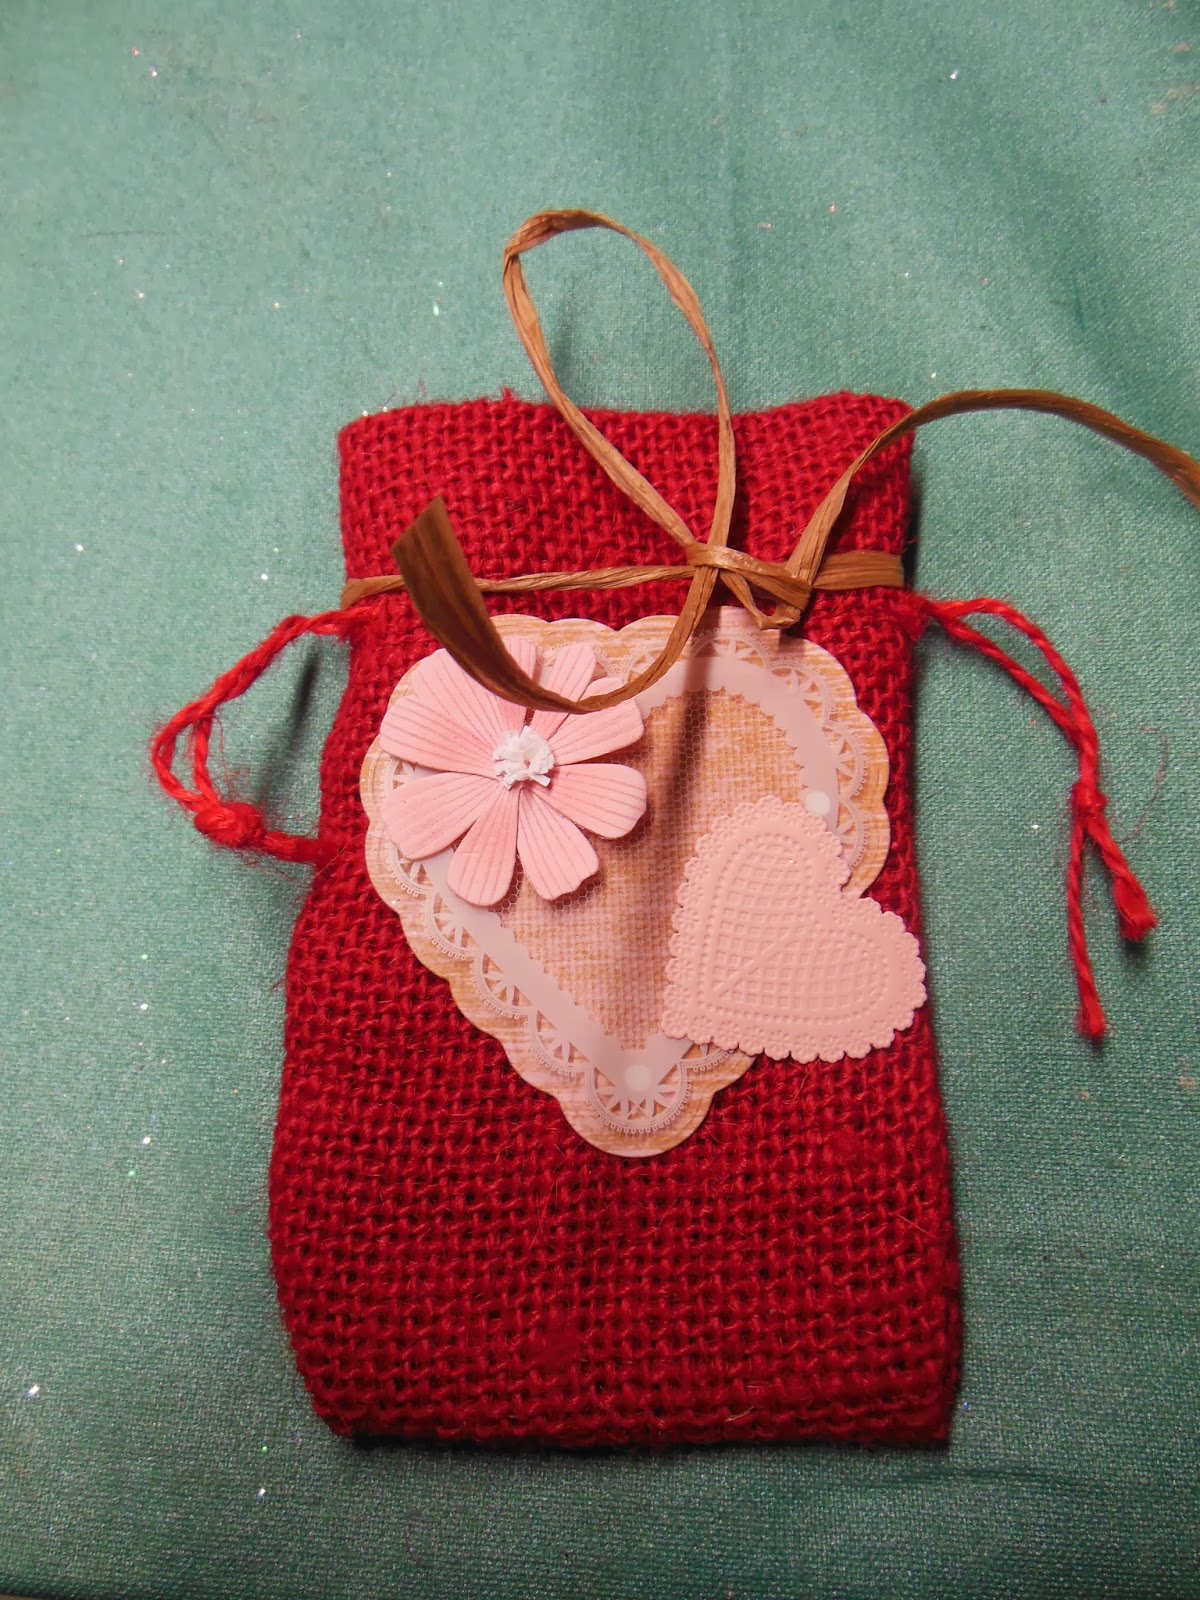
     The next challenge for the Decorate to Celebrate Design Team is Valentines Treat Bags.  I found these adorable mini burlap bags in the clearance bins and knew I had to use them!
      With a great selection of stickers from Martha Stewart and Michaels, this was a quick and easy way to have cute little bags ready to give out to all my Valentines :)

YOUR STORY:

   What you will need:

Stickers, raffia, ribbons

Mini Burlap Bags


     Start layering on the stickers and some you can just leave plain, it is really all up to you.  HINT:  Leave the "background" sticker on the plastic sheet it comes with.  It is easier to layer and then pull up the finished piece.  Sometimes I add a little glue for extra staying power.
Layer various stickers in different combinations

Adhere to the front of your bag
     I think these treat bags are very sweet and are perfect for little treats or potpourri for sachets.  I have told my husband jewelry would fit quite nicely in these also!  And since there is little cost and time associated with making these bags, I like to make a big stash and keep them handy for dentist's staff, mail carriers, teacher gifts, etc.  Have fun and show someone you love and appreciate them this Valentines Day.  xo


Add a ribbon loop so you can hang from a doorknob


Saturday, January 18, 2014

Weaving Sticks...Not Your Grandma's Knitting

MY STORY

     On my crafting bucket list, there remains some key things:  learning to sew, learning to knit.  And a few hundred more, but these are at the top.  At an industry craft show, I attended a workshop sponsored by Clover Needlearts.  Well, all I can say, is I'm hooked.  This is a great project for using up your yarn supplies and it is so much fun to do.  You are only limited by your imagination.

     I am newer than a newbie, so I'm leaving the instructions up to the professionals.

YOUR TURN

     My favorite crafting blog, Craft Test Dummies, has a wonderful tutorial on the Clover Weaving Sticks.  Check it out, this a great blog. In addition to one of the best blog names, they have amazing information and the best tutorials.

Craft Test Dummies Blog

     YouTube is another great resource for craft tutorials.  Here is one from the manufacturer.  This is an affordable and portable craft and until I learn to knit one and purl two, I am all about Weaving Sticks by Clover Needlearts.


Wednesday, January 8, 2014

Decorate To Celebrate Design Team Challenge

MY STORY

     As I sit watching the snow fall and the ice forming, it was a perfect time to do my first Decorate To Celebrate Design Team Challenge - snowflakes!

     In my post-Christmas sale shopping, I was able to acquire beautiful ornaments for a ridiculously low price.  I had found a white twig in our garden which gave me the perfect stepping off point to create a snowflake banner.


YOUR TURN
     The Paper Source has a great supply of banner blanks which I covered in winter themed paper.  Using ornament hooks I just hung the ornaments off the twig and applied some stickers onto the paper and the twig itself.  This is an easy way to brighten up a window and great for the kids to help out with.  It may be stormy outside but having this banner on my studio door makes me appreciate the beauty that a Northeast winter can bring.


Wednesday, January 1, 2014

Recycled Holiday Cards

MY STORY

     I love receiving Holiday cards.  Not only do I enjoy reading about my friends and families adventures, there are so many beautiful cards that I hate to throw them away.  In addition, my ritual post-Christmas shopping involves buying up more cards and Christmas supplies at crazy prices.  Now, that makes me happy.

    So I have come up with a few ideas to use your holiday cards while saving some trees and money for next holiday.  (As a crafter, we are always a few months ahead of the calendar).

   Be creative with these ideas and show me what you come up with.  These concepts can also be applied for cards you get and send throughout the year.  The potpourri sachet idea?  Just by using a different type of card, this can be made into a cute teacher's gift, or a birthday gift.  Crafts are not just for Christmas!

YOUR TURN

    Please take a look at my ideas....this is also a great activity to do with the kids on those snowed in days.


Monday, December 30, 2013

Crafty Bargain Hunter

MY STORY

     If you are like me, nothing says Christmas like the after Christmas sales.  I'm not talking about electronics or handbags, but craft supplies and holiday cards.
     Today's outing took me to some of the large and small craft stores in my neighborhood.  With coupons and Christmas crafting items up to 80% off (wahoo), I have stocked up on some great last minute gift supplies and started compiling my stash for next year - I know it is a sickness but who cares?  More on how to use holiday cards later, but here are a couple of quick and easy ideas that cost next to nothing to do.

YOUR TURN

  I love having some cute coasters made as last minute house party gifts or home decor.  I use these year round, but with the Christmas bargains and some other supplies you can create fast, easy and inexpensive gifts.  For the coasters you will need:

  • Rub On Transfers.  There was still a large collection of holiday transfers available and with dramatically reduced prices, each package (which can create 4 coasters) was about $1.20.
  • Mod Podge
  • Felt backing (I have a big supply of the round felt pieces I got at a home supply store.  Package of about 50 pieces was only $2.99)
  • Tile Coasters - I also got these at a  home supply store.  They are slightly irregular so you may not want to put them up as a kitchen backsplash, but for crafting they are perfect.  Box of 10 about $2.00.
STEPS:
  • Cut out transfer image, peel off backing and rub onto tile.  That is it!
  • Cover with Mod Podge and when dry add the felt backing.  These coasters are great with both warm and cold beverages and how cute!   Wrap them up in a big ribbon and they make a great housewarming present.  


   There are so many great transfers available, you can whip this up before you head out to that New Years Eve party tomorrow.

   I have some pretty diverse styles when I decorate and in parts of my house I am all shabby chic and pastel and then sometimes a girl just has to glam it up.  I like these modern trees and trust me they are so simple to make.

     You will need:

  • Styrofoam cone shapes.  With the markdowns I was able to snag these for $1.00 each.
  • Bottles of glitter - depending on what color you want to use.  The holiday colors were marked down so I scored three bottles for about $2.00 each.
  • Spray on adhesive
  • Foil roasting pan - I don't cook but love these for crafting. You will need one for each color glitter.  
  • Wire - comes in various colors and gauges, I like the thicker gauge for this project.

STEPS:
  • Place the trees in the roasting pan and cover one tree at a time with spray adhesive.
  • Dump the glitter into the pan and roll the tree around until covered.  Let dry.  HINT:  The glitter you don't use can be put back in the jar for future projects.
  • Wrap the wire as desired - no pattern, free form seems to work better.  And you are done!


Sunday, December 22, 2013

DIY Art

MY STORY

     I am always that annoying person gathering up paint swatch cards, Pantone chips and sample bottles of wall paint.  Since I was a kid, I have this need to continually switch up the wall colors in my house, add different artwork which can get kind of expensive.

     I have come up with some easy ways to create simple artwork out of washi tape, fabric scraps and antique scarves.  Here are some ideas.  Show me what you come up with.

YOUR TURN

     The supplies you need are inexpensive and easy to find:

  • Blank canvas; foamboard; styrofoam shapes;old frames
  • Washi tape; fabric scraps; paper; old clothes.  Any items that you want to use works well
  • Scissors; fabric glue; T pins; 
  • Mounting tape (this works great for these lightweight items and anything that doesn't require a hammer and nails I'm happy with).
ANTIQUE FABRICS:

     I inherited a lot of scarves from my Grandmother.  In every photo and in many memories I remember these little squares of fabric.  These are not items I want to cut up or manipulate and I found that just putting them in frames gave them the respect these memories deserve.


HOLIDAY IDEA

     After all my wrapping was done, I found I had a lot of washi tape left over.  I simply took some of my favorites and wrapped around a lightweight piece of styrofoam.  I like using an odd number of colors/images.  Randomly tape around and you can use with T pins to hang your holiday cards on, or cover with a coat of Mod Podge for extra durability and place on your table.  


MEMORIES 

    A good friend of mine had been saving a lot of her father's old shirts; pants; ties to make a baby quilt for her little boy.  Unfortunately, Hurricane Sandy hit us pretty hard and she lost almost everything.  She had very few scraps to work with.  We came up with the idea to use these little bits wrapped on small canvas and put on little easel stands.  Her baby's bedroom was a nautical theme, so the blues worked out well.  Although it was not the quilt she had imagined, just this little display keeps her intention alive of having some of Dad's clothing around for her son.


FABRIC

     Couple of projects I have been working on is to create easy and inexpensive art for friends.  Using foamboard, canvas and/or styrofoam I go through my fabric stash and have been able to do some fun artwork for them.  The first example is actually for my studio.  I wanted a Bonnie Cashin/fashion illustration/Parisian feel to the work.  When you decide the background piece you are using, lay your fabric out, place the canvas as top to insure you capture the image you want and cut out, leaving an inch around for wrapping the canvas.  For this illustration I used a dark pen, but use a pencil or disappearing marker for best results. Then wrap around the foamboard, adhering with some glue.


     For my friend's newborn twins, a boy and a girl, I was excited to find this Debbie Mumm fabric.  Same Noah's Ark theme, but in two different colorways.  HINT:  If you are deciding to use canvas as your backing, many of them come individually wrapped in plastic.  Keep the plastic on.  If you change this art later, it is easier to remove and you have preserved the integrity of the canvas.


     You can also layer fabrics - this is for a little girl who was growing out her baby room and my friend wanted modern, but still girly art.  This fabric came with a natural frame around it, so I thought it was a great one to use, backed by a complementary fabric on canvas.


     So if you are addicted to changing up your home decor like I am, these easy and inexpensive projects will soothe your guilty conscience next time you are switching things up.


Monday, December 16, 2013

Holiday Hang Ups

MY STORY

     I am always looking for interesting ways to display my holiday cards.  I found this idea on Martha Stewart's website last year and I have seen various versions of it on Pinterest.
     Very easy and affordable - supplies cost less than $10 @ Michaels - and this time of year, trust  me, I am watching everything I am spending!

YOUR TURN

     All you need for this project will be:
-    a 14" embroidery  hoop
-    craft size clothespins
-    jar of snow paint
-    red bow
-    wooden Noel (or your choice) premade wood sign

STEPS:
1.  Glue the clothespins around the embroidery hoop.  Alternate with the "pinchy" part facing up and down.
2.  Add dabs of snow paint as desired.
3.  Add bow and wooden ornament

And just like that you have a card wreath.  Check out my HOMEMADE HOLIDAY board on Pinterest for more easy and cool Holiday ideas:
http://www.pinterest.com/phstudio


PHOTOS:


Sunday, December 15, 2013

My Holiday Confession

MY STORY


     Friends and family....I have a Holiday Confession to make.  For years I have been cutting up your holiday photo cards.
     Now before you start judging me, take a look.  With the advent of easy to use photo editing software and companies like Shutterfly and Vistaprint to name a few, your cards are becoming more beautiful each year.  And I love seeing how families grow, what trips and adventures the previous year has held for you.  But I was finding that they would just end up in a pile and I could not give your time and effort the respect they deserve.
     For the past few seasons, I have been taking scissors to your masterpieces.  I create one big collage with all of them and keep the final result out on display for my family and other friends to admire.  At the end of the season, I carefully pack them away with my other treasured ornaments and decorations.  When I start my planning for the next year, I take it out again and admire the cards and love to compare against the new ones I receive.
     So instead of being an unappreciative friend, I am probably keeping your cards longer than anyone else.

YOUR TURN

     Check out how quick and easy it is to create your own collage with your families' and friends' loved ones.


Sunday, December 8, 2013

Holiday DIY Made Simple Part 4

MY STORY

     Now that they have such cute insulated lunch bags available, I realized I had an overabundance of the old school brown lunch bags.

     With just some stickers and tape you can create customized gift bags for the holiday season with just a little time and for little money.  They are a wonderful blank canvas in some many ways.


YOUR TURN

     Follow these easy step by step instructions and you will love how easy these bags are to do!  Happy Crafting!