Wednesday, June 24, 2015

A Gift Box For Baby

MY STORY

     It's challenge time again at Decorate To Celebrate!  If you need some great projects and inspiration for your next celebration check at their blog:  Decorate To Celebrate

     I love finding ideas for re-purposing or upcycling in my crafts.  For this challenge, I created a gift box for the new baby which makes a nice keepsake item that the new parents can use.  They can keep special items in it like that first lock of hair or first tooth or even remove the box cover and hang as wall art.  Here we go!...

YOUR TURN

     You will need very few supplies for this project:


  • Any size box
  • Paper of your choice - sample uses Paper Source paper
  • Backing papers - again using Paper Source product
  • Domino shaped wood pieces - from Michaels
  • White , gold acrylic paint and crackle paint - from Michaels
  • Stickers - from Michaels
  • Decorative clothespins - from Michaels
     Paint the inside and all surfaces of your box -- this sample used gold acrylic paint, but use any color that complements your idea.  Once dry, place the cover upside down on the reverse side of your paper and adhere.  Handmade paper tends to be thinner than card stock, so be frugal with how much glue you use.


    Paint the domino shaped wood pieces in white (or whichever color you have chosen).  I like the look of a little rustic mixed with the metallic in the paper and stickers so after your color paint has dried, apply a layer of crackle paint.  It takes about 2 -4 hours to dry and you will be left with a little weather beaten effect.


   Once the paints have dried, apply your stickers as desired. 

    Then glue to a sheet of backing paper.  (Currently I'm obsessed with the gold and light pink palette.)  Cut out using decorative scissors. HINT:  Based on the size of your box, and the amount of letters  you need, lay down on the paper to insure everything fits on the box top.  If you are using a lot of letters, you may need to trim your backing paper more than in this example.


    Glue your backing paper with the wood shape onto another sheet of card stock -- for this example I used gold glimmer.  Cut out.


    Clip your clothespin onto the papers and glue into place.  


  I think this is an adorable way to give a gift to the new baby and their parents.  Happy crafting!!


Saturday, June 13, 2015

Make your 4th sparkle with The Buckle Boutique

MY STORY

     I love our flag and I am proud of everything it stands for -- freedom, history, sacrifice, hope.  I picked up a bunch of flags to decorate our house -- in honor of the holiday and our US Marine Corps son!

    While working on some table decorations, I thought one of the flags would look awesome in the centerpiece.  And with using just a few scraps of the great rhinestone sheets from The Buckle Boutique, it will really make my holiday, and yours, sparkle!   Check out all the amazing rhinestone sticker sheets at THE BUCKLE BOUTIQUE.

YOUR TURN

    This concept is so easy and you can apply it to any holiday or celebration -- think pink and blues for baby showers, red and green for holidays, gold and browns for fall.  These sheets stick on almost any surface so it is fast and easy to bring out your inner bling.

    Taking a basic flag you can find this time of year at craft or dollar stores, I measured out the red stripes and simply cut and applied.  That is all there is to it!

    And a I had a red striped mug hanging around, so just added little strips of blue rhinestone, it becomes a fun July 4th decoration.

    Happy July 4th -- have a fun and safe holiday from The Everyday Muse.


RhinestoneBorder
Follow The Buckle Boutique at our Blog  //  Facebook  //  Twitter  //  Pinterest
Shop The Buckle Boutique at our Main Store and Etsy
Tips and videos for cutting our rhinestone sticker sheets can be found HERE
Are you a retailer who would like to carry The Buckle Boutique's products in your store?
Please contact us for wholesale pricing information.

Wednesday, June 10, 2015

Legal Graffiti with The Buckle Boutique + a new customer coupon!!!!

MY STORY

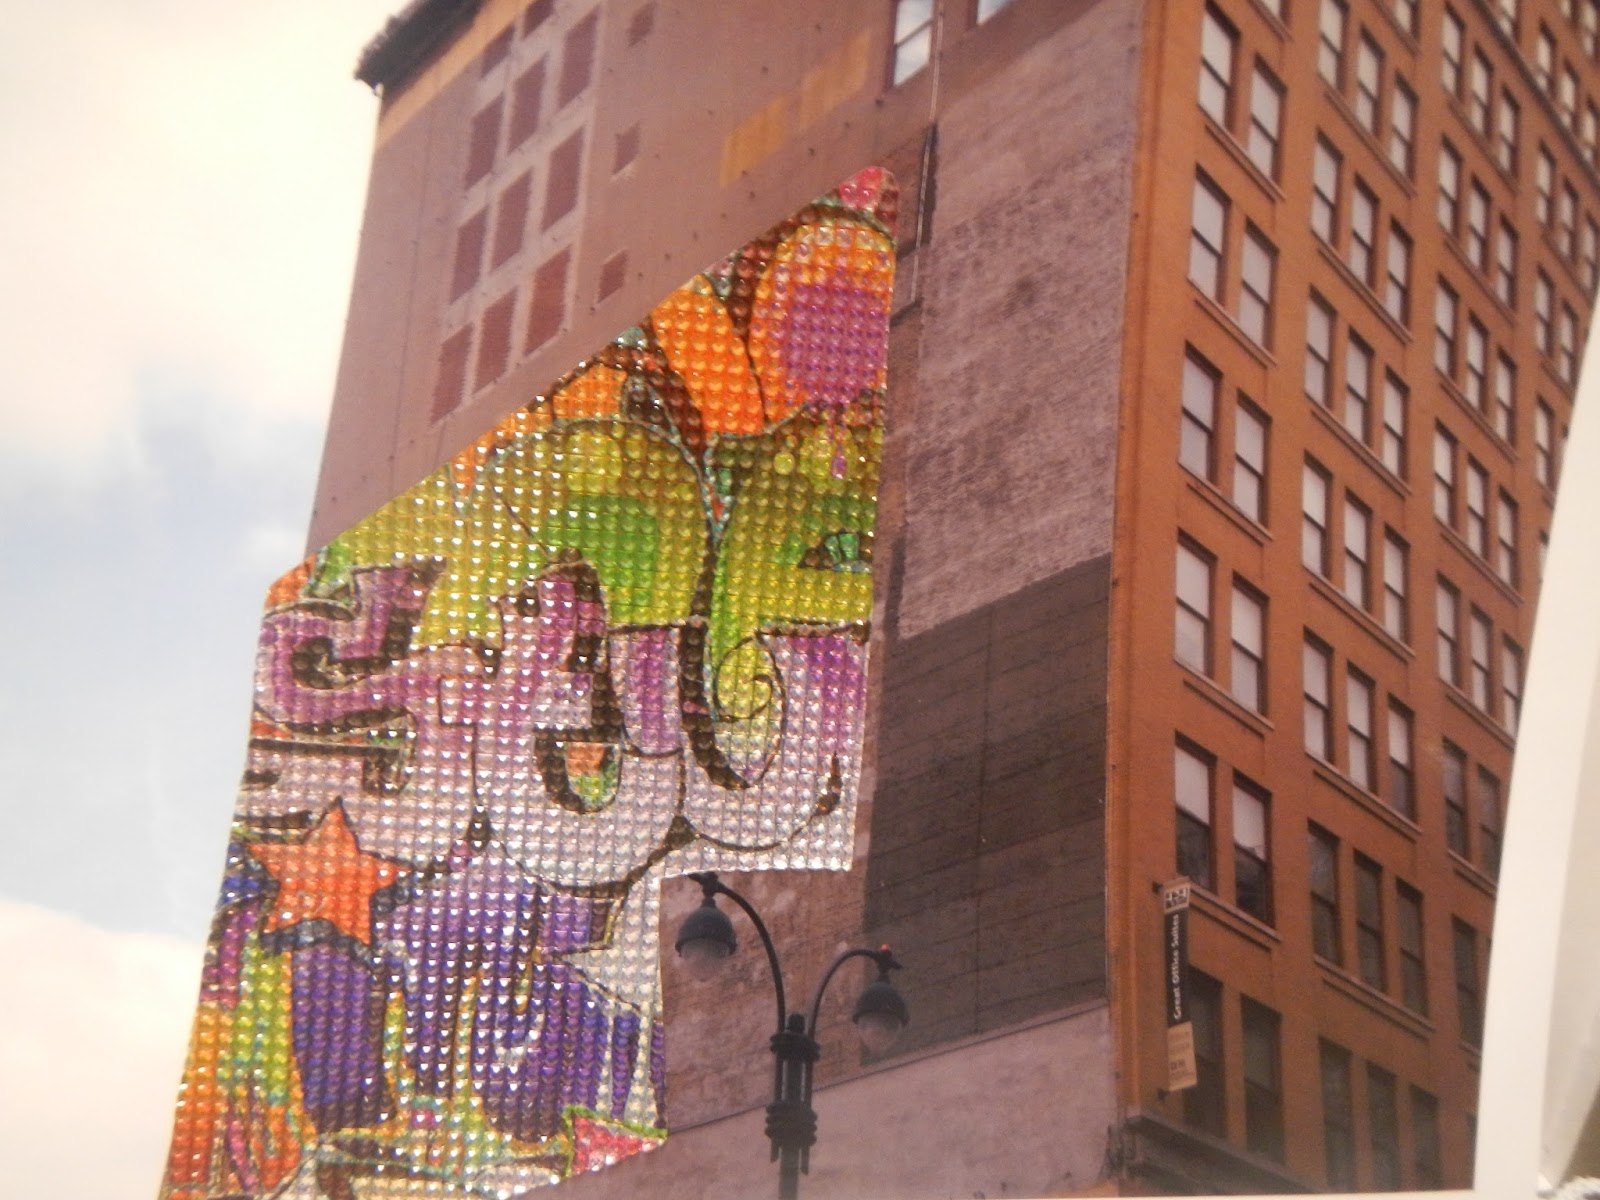
     As a lifelong New York City girl, graffiti has been a part of the landscape as much as skyscrapers and subways.  Although there has been some amazing artwork generated from this underground movement, it is still frowned upon as vandalism and illegal.  Regardless of your take on what is art or not, I had fun with manipulating some of my NYC photos.

    Using only half of a rhinestone sticker sheet from The Buckle Boutique I was able to add some "legal" graffiti into my photos.  These graffiti sheets are part of the Marisa Pawelko line.  Check out the Buckle Boutique website for a look at all the amazing product available.


    And if you act now, new customers receive 15% off their first order.  This product is easy to cut, peel and apply and stick on to most surfaces (I've yet to find out that hasn't worked yet!).  Here is the link to get your code:  New customer coupon.

   Now here is my legal graffiti:

YOUR TURN

    You can use any photos that work for you, I took some recent pics on a trip in The Big Apple.  Choose a photo and print out on regular paper.


    Cut out the piece of the photo that you would like to replace with the graffiti sticker sheet.  NOTE:  these sheets go a LONG way, you will get addicted and not want to stop!  Don't worry if you have to cut out big sections of your photo to get to the template.  You won't need to keep the integrity of your original photo.  HINT:  If you have more than one placement, note the location on your paper template and then on the back of the corresponding sticker sheet.  Saves time in figuring out where everything should be placed.


    Once you have the paper template, place upside down on the BACK of your sticker sheet.  This way you will have the right measurement when you go back to apply.

    Cut out the piece / pieces as you have measured.

    Print out the same photo on glossy photo paper -- no need to cut anything out.  Just peel off the backing and adhere your sticker sheet onto the photo.


   And that's it!  This technique can be used in any format and with any photo -- think wedding shots, stationery, scrapbook layouts, canvas.  It really is endless to what you can come up with.  Here are more before / after photos.  Happy Crafting!!   And don't forget to get your hands on some rhinestone sticker sheets with the fantastic new customer coupon!!


RhinestoneBorder
Follow The Buckle Boutique at our Blog  //  Facebook  //  Twitter  //  Pinterest
Shop The Buckle Boutique at our Main Store and Etsy
Tips and videos for cutting our rhinestone sticker sheets can be found HERE
Are you a retailer who would like to carry The Buckle Boutique's products in your store?
Please contact us for wholesale pricing information.

Decorate To Celebrate Challenge Time - a special frame for Dad

MY STORY

     It's challenge time again at Decorate to Celebrate!  Make sure you check out their blog for tons of inspiring projects to kick your celebrations off into high gear!  Decorate To Celebrate blog

     Two things I know to be true:  1) I get lost in Pinterest and 2) Mothers always have saved some of their children's toys.  My son is now 20 years old, a Corporal in the US Marine Corps, and there are just some things I can't toss.

    So on a recent journey through Pinterest, I found this project which intrigued me:  Pinterest. Now the website that featured the project is in Spanish, but you get the idea.


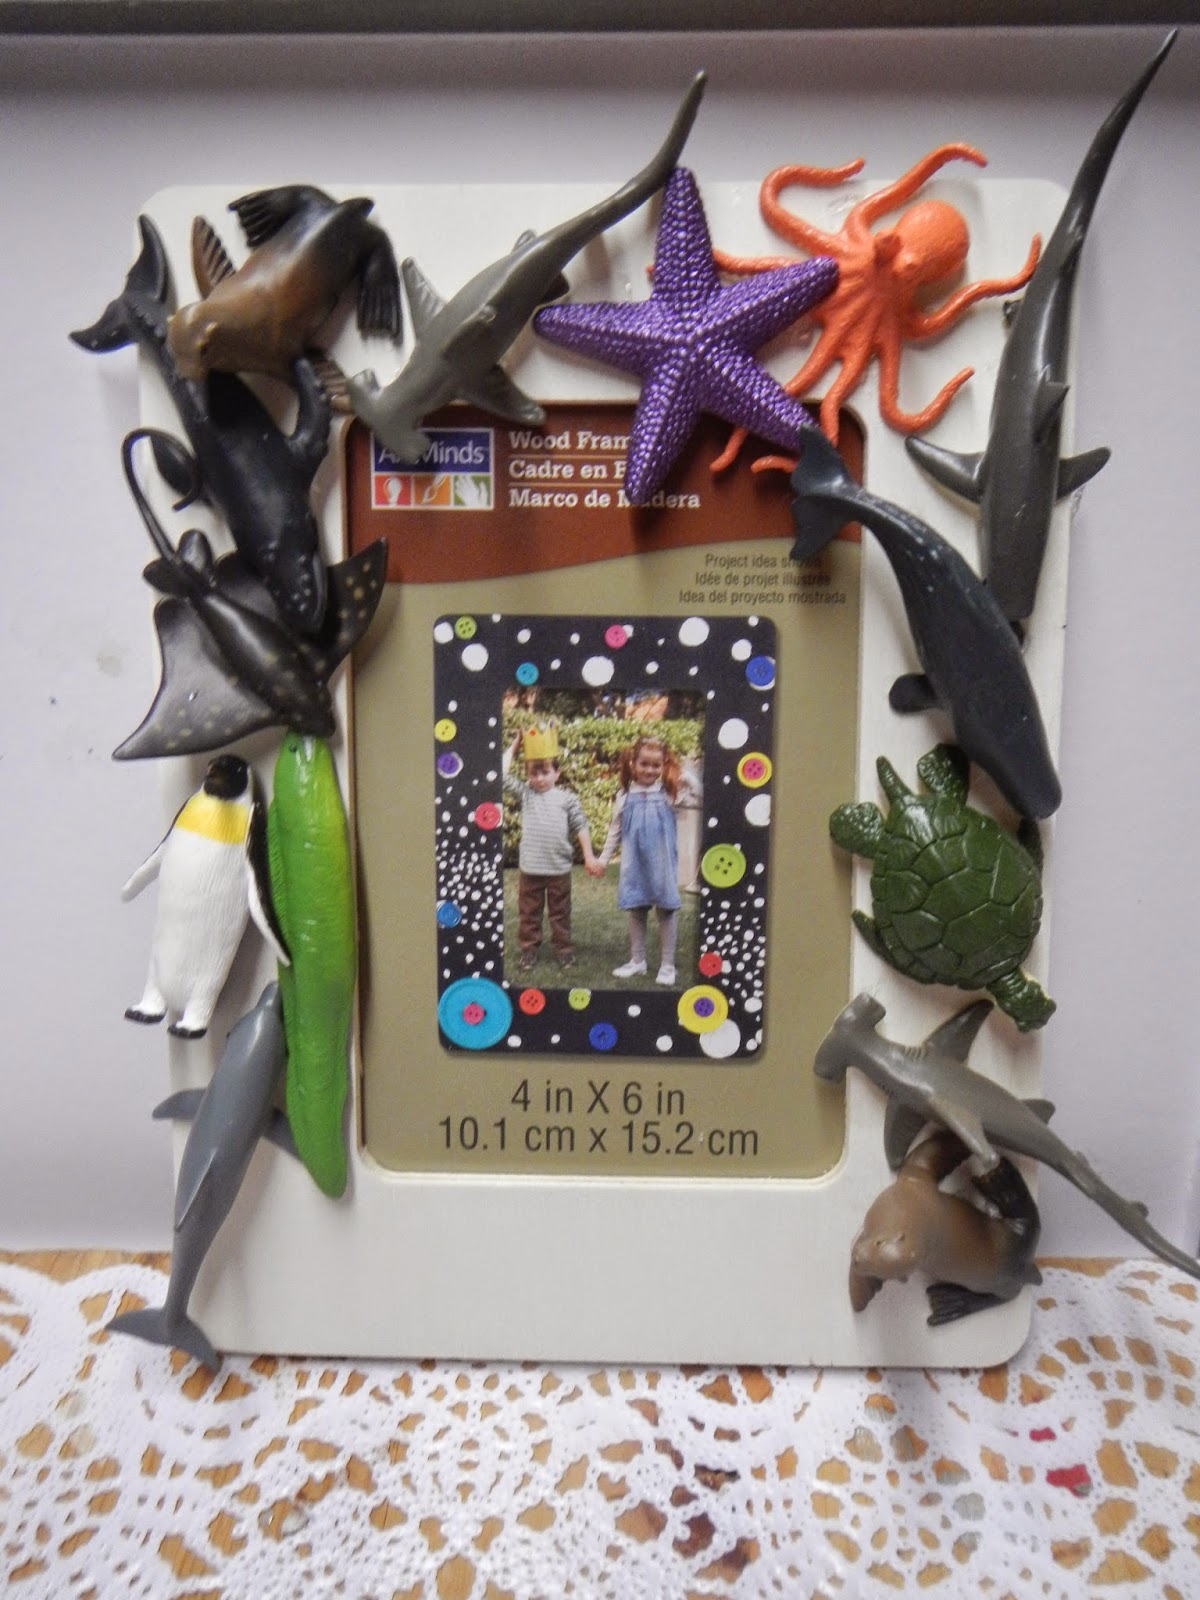
   I loved this idea on many levels, and thought, what a great gift this would make for a new Dad, or anyone celebrating Father's Day.  How cute would this be to gather up some old toys from an expectant Dad and use it for a frame?  Here's my interpretation of this project.  Have fun and use your imagination on this.

YOUR TURN

     What you will need:
  1. Plastic toys
  2. Inexpensive frame - large frame size so you have room to add your toys
  3. Spray paint and spray sealer - color of your choice.  Be sure to read the can and make sure it works on plastic.  Not all brands do.
  4. Scrabble letters or stickers
  5. Strong glue

     Lay out the toys you are using before gluing to insure you like the layout.  Then just glue them into place.


     Once dry, spray paint the entire frame.  Some hints:
  • I like using a shallow box for spray painting.  It limits the amount of spray you let out into the air and you can turn the project around to cover all sides and angles.
  • Spray outside and don't use near pets or kids.
  • Sometimes I like to use a mask, those fumes can be strong
  • When choosing your paint, look closely to see if the finish is matte or glossy.  I used matte paint and a glossy sealant.
  • Keep the paper insert that came with the frame in place.  That way, you won't have a lot of paint going into your box.

     Spray one even layer and let dry.  My example used two coats of the spray paint.  Once color is dry and you are satisfied with the color, spray a clear sealer over the paint.

     Once everything is dry, add some scrabble tiles or stickers to personalize as desired.

  My son loved the beach, especially hanging out with his Dad and he used to collect tons of ocean related rubber toys.  I thought this would be a great combination and I hope his Father likes it!!!