Wednesday, September 30, 2015

Take Charge With The Buckle Boutique

MY STORY

     If your household is like mine, you are overrun with chargers, headphones, etc.  Instead of hearing "hey, those are my headphones!" or "hey, isn't that my charger?" add some bling to your items and they will sparkle and stand out on their own!!!

    With so many patterns and colors available from The Buckle Boutique, you can satisfy everyone's tastes.  This project is also great to use with scraps from previous uses.  No matter the shape or size, the rhinestone sticker sheets are easy to cut and apply.  Check out all the great products on their website and you will become addicted to bling on everything!  The Buckle Boutique.

YOUR TURN


RhinestoneBorder
Follow The Buckle Boutique at our Blog  //  Facebook  //  Twitter  //  Pinterest
Shop The Buckle Boutique at our Main Store and Etsy
Tips and videos for cutting our rhinestone sticker sheets can be found HERE
Are you a retailer who would like to carry The Buckle Boutique's products in your store?
Please contact us for wholesale pricing information.

A BOO-tiful Halloween project

MY STORY

     I may not have a little kid running around the house anymore, but I still love Halloween.  I came up with a simple way to decorate your little one's goody bags, and some home decor and card making ideas.  Have fun!

YOUR TURN

What you will need:

-plain cardstock
-complementary cardstock - Halloween or fall colors
-gauze
-white glue
-googly eyes
-scissors - regular + decorative
-twine or ribbon
-brown paper lunch bags
-washi tape (optional)
-stickers / scrabble letters
-hole punch
-rubber stamp ink (optional)

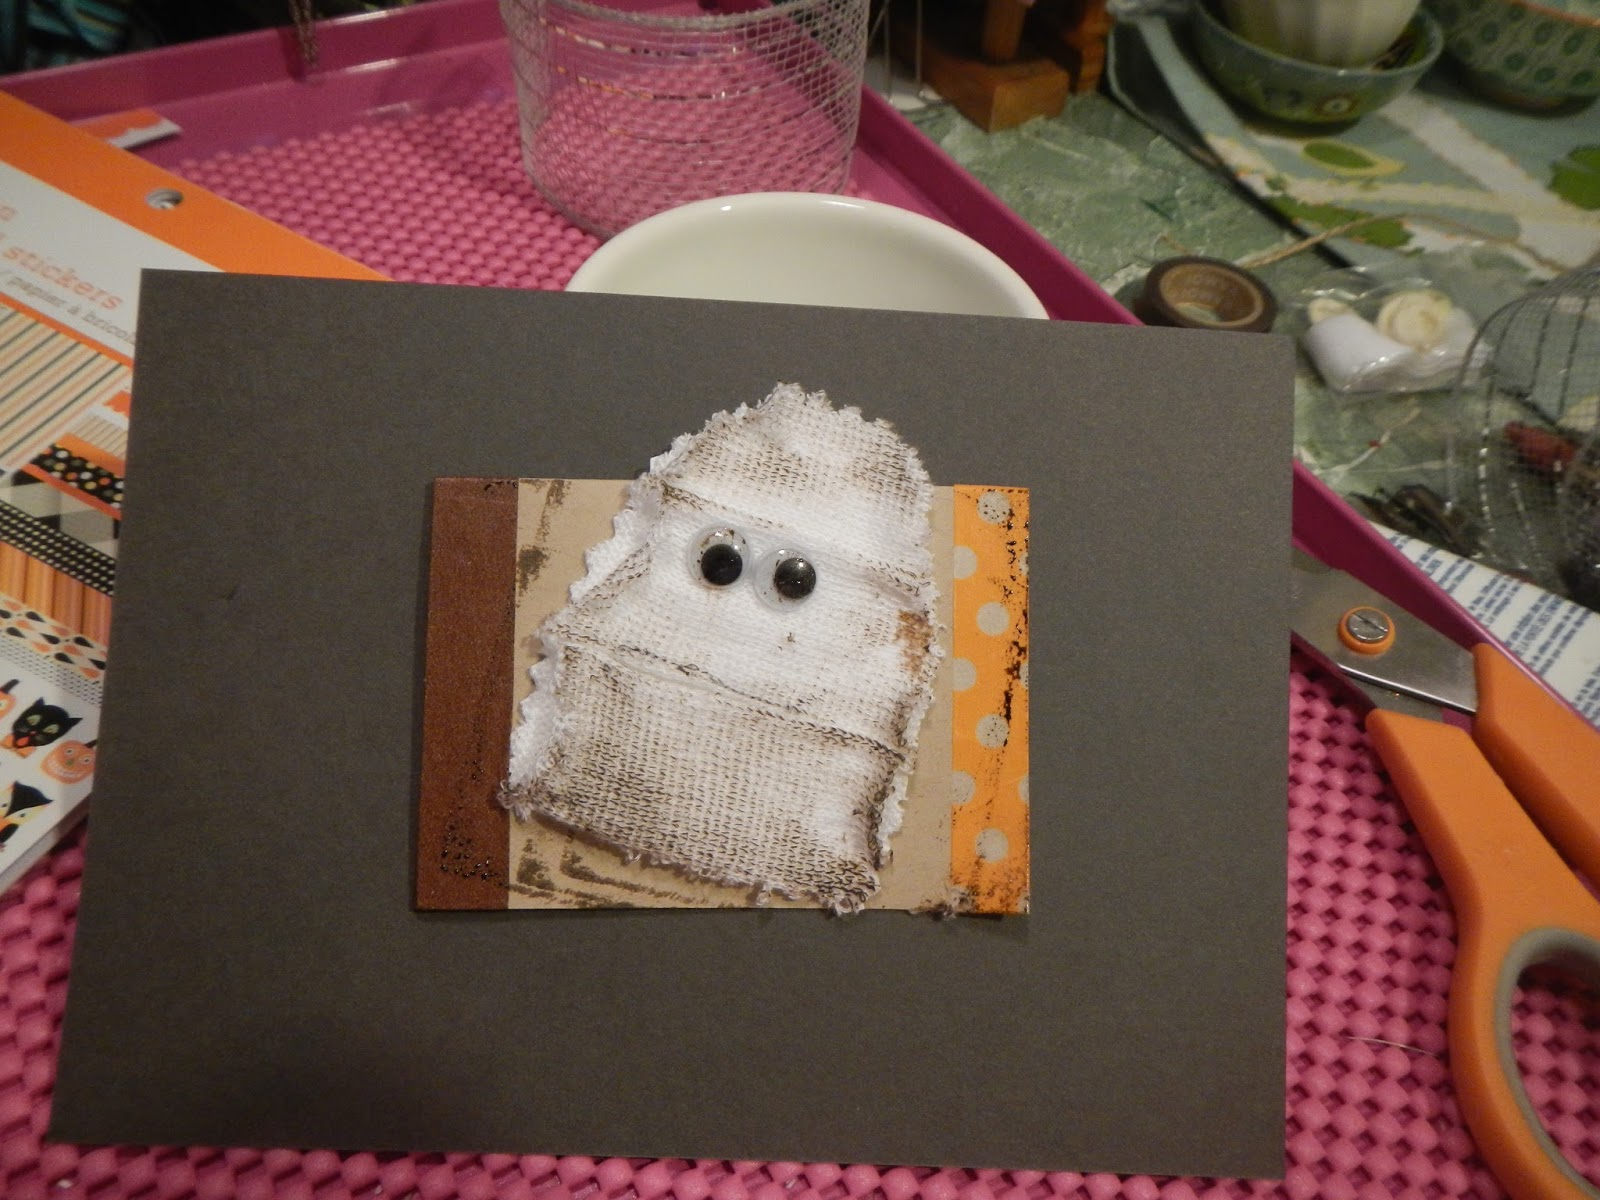
To make the mummy:  Cut out a shape from plain paper/cardstock.  I was just concentrating on the head and not the whole mummy body!


Apply the googly eyes first.  Try different sizes and placement and each of your mummies will have its own personality.

Wrap the cardstock with the gauze in an uneven manner.  To save your gauze, you may not have to wrap the entire piece with it, just place on the front.  And that's it!


CARD:  Add paper to your blank card.

Glue your mummy onto a complementary paper and cut out with pinking shears or decorative scissors.  Apply to cardstock.

Using scrabble letters / stickers / or your own handwriting add in BOO.  I added the #Boo to make it more trendy.

GOODY BAG:  Following the same concepts, decorate the front of a brown lunch bag.  This would be fun for giving out to the neighborhood kids or for a goodie bag at your Halloween party.  Fold over the top, punch a hole, cut off the top of the bag and close with twine or ribbon.


BOOKMARK:  If you don't have to worry about scaring little ones, add some red ink and you will easily have a bloody mummy.  Add to a scrap of paper for a cupcake topper, bookmark, etc.  Think of how many ways you can use this!


If mummies are not your thing, make your shape into a ghost.  Instead of wrapping at different angles, cover your piece evenly with the gauze.  Add the eyes on top of the gauze and cut around the whole shape with decorative scissors.

PLACECARD:  Glue your completed ghost onto a placecard blank -- have him peek up over the edge for some added interest.

CARD:  Layer the placecard onto a blank greeting card that you have covered in complementary paper and add some stickers.

DECOR:  I have this antique hanger which I just love.  I added the placecard and thought this made a nice addition to home decor for the holiday.

I wanted to give my ghost a little bit of a beat up look so I dabbed some antique rubber stamp ink to make him look a little older.

And that's it!   Happy Halloween!


Wednesday, September 16, 2015

Bling Up a Store Bought Banner

MY STORY

    It's Decorate to Celebrate Challenge Time again.  Check out their website for more projects to inspire your party planning!  Decorate To Celebrate Blog.

   Life gets busy.  And yes, sometimes messy.  There is not always enough time to get everything done.  Here is a fun and quick way to embellish a store bought party garland and bling it up with sticker sheets from The Buckle Boutique. Check out sticker sheets and other embellishments to bling up your life! The Buckle Boutique website.

YOUR TURN

    I picked up this fun garland @Michaels by @MarthaStewart.  HINT:  You may not always need the full length.  You can cut the bakers twine and get a couple of garlands out of one package.  Just make sure you tie off the ends at each cut end.


    This garland is so pretty, but by adding some bling with the sticker sheets, you can still have a custom made party decoration, and it takes less than 10 minutes.

    Using one of pendants as a template, trace the shape around the back of your desired sticker sheet. Once you cut out, and you are happy with the shape, use this as the template for the rest of your blanks.


    The sticker sheets are easy to peel, apply and stays on so easily.  If your cutting is not exact, you can trim as needed.


    And that is all there is to it to spruce up a store bought item.


     Happy Crafting!


RhinestoneBorder
Follow The Buckle Boutique at our Blog  //  Facebook  //  Twitter  //  Pinterest
Shop The Buckle Boutique at our Main Store and Etsy
Tips and videos for cutting our rhinestone sticker sheets can be found HERE
Are you a retailer who would like to carry The Buckle Boutique's products in your store?
Please contact us for wholesale pricing information.

Wednesday, September 2, 2015

Hand Painted Votive Holders with Bling Accessories

MY STORY

     It's challenge time at Decorate To Celebrate!  Head over to the DTC blog for great projects and inspirations for your next celebration Decorate To Celebrate Blog.  And I couldn't just paint the holders but I felt they each needed some bling accessories.  Check out the great products at The Buckle Boutique to add bling to your life The Buckle Boutique.

YOUR TURN

     All you need:
  • Glass votive/ candle holders
  • Acrylic or glass paint in a variety of colors
  • Rhinestone sticker sheets / Buckles from The Buckle Boutique
  • Thin paintbrushes
  • Rubbing alcohol wipes
    Clean your candle holders with soap and water and once dry, wipe clean with rubbing alcohol wipes (found at any drugstore).  For these examples, I had three themes in mind:  Holiday, Beach and Wedding.

HOLIDAY:

    I chose red, green and metallic gold for my holiday look.  Starting with the darkest color, pour a small amount of paint on your palette (I use a VERY expensive palette as you can see).  Simply paint dots around your votives.  Once dry, add your second color, etc., until you have used all your colors.  Add a touch of bling around the top and you are ready for your holidays.


   Based on my first approach, I made some changes for my other examples.

BEACH:

     I did not care for the original brush I used so I switched it out for another thin brush. I also found it easier to fill the holder with a papertowel, it made it easier to see what you were doing.   I also painted the dots much closer together and I really liked this effect.  Same process as above.  Make sure you let each color dry before applying the next one.  And I found by overlapping some of the colors it added a nice textured look to the paint.  And of course, some bling to make it sparkle!


WEDDING:

    For this look, I decided on a monochromatic color scheme -- all metallic in champagne, titanium and platinum.  Again, I went for a larger dot, and less space around the colors.  And by adding some antique ribbon and a beautiful starfish from The Buckle Boutique, your wedding celebration will sparkle!  


    Happy crafting!


RhinestoneBorder
Follow The Buckle Boutique at our Blog  //  Facebook  //  Twitter  //  Pinterest
Shop The Buckle Boutique at our Main Store and Etsy
Tips and videos for cutting our rhinestone sticker sheets can be found HERE
Are you a retailer who would like to carry The Buckle Boutique's products in your store?
Please contact us for wholesale pricing information.