Showing posts with label #MarthaStewart. Show all posts

Wednesday, September 16, 2015

Bling Up a Store Bought Banner

MY STORY

    It's Decorate to Celebrate Challenge Time again.  Check out their website for more projects to inspire your party planning!  Decorate To Celebrate Blog.

   Life gets busy.  And yes, sometimes messy.  There is not always enough time to get everything done.  Here is a fun and quick way to embellish a store bought party garland and bling it up with sticker sheets from The Buckle Boutique. Check out sticker sheets and other embellishments to bling up your life! The Buckle Boutique website.

YOUR TURN

    I picked up this fun garland @Michaels by @MarthaStewart.  HINT:  You may not always need the full length.  You can cut the bakers twine and get a couple of garlands out of one package.  Just make sure you tie off the ends at each cut end.


    This garland is so pretty, but by adding some bling with the sticker sheets, you can still have a custom made party decoration, and it takes less than 10 minutes.

    Using one of pendants as a template, trace the shape around the back of your desired sticker sheet. Once you cut out, and you are happy with the shape, use this as the template for the rest of your blanks.


    The sticker sheets are easy to peel, apply and stays on so easily.  If your cutting is not exact, you can trim as needed.


    And that is all there is to it to spruce up a store bought item.


     Happy Crafting!


RhinestoneBorder
Follow The Buckle Boutique at our Blog  //  Facebook  //  Twitter  //  Pinterest
Shop The Buckle Boutique at our Main Store and Etsy
Tips and videos for cutting our rhinestone sticker sheets can be found HERE
Are you a retailer who would like to carry The Buckle Boutique's products in your store?
Please contact us for wholesale pricing information.

Wednesday, August 19, 2015

Gilding Your Party

MY STORY

     It's Decorate To Celebrate Design Challenge time again!

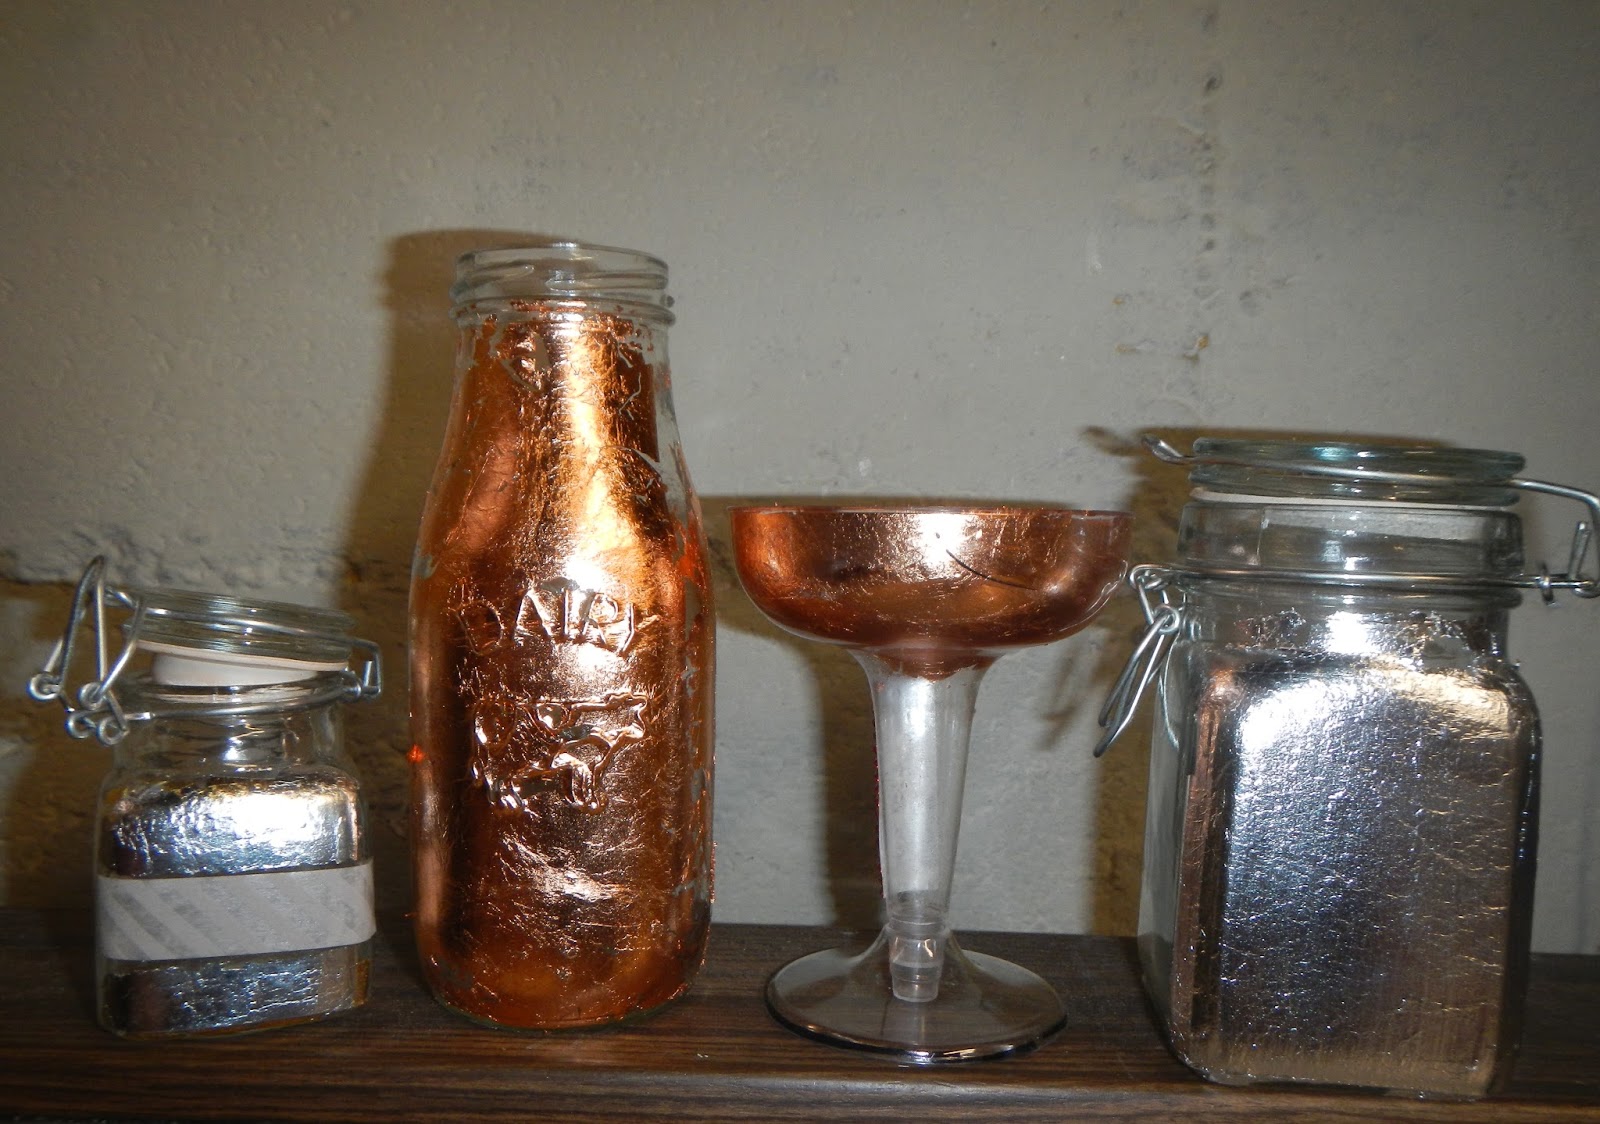
     I love my collection of various bottles and jars and wanted to try out gilding products from Martha Stewart's line of craft items, produced by Plaid, at Michaels.  It was fun and easy to add a metallic touch to items -- here you go.

YOUR TURN

    What you will need:


  • Plastic / glass containers - clean and dry

  • Gilding products:  adhesive, brushes, foil sheets
  • Scissors
  • Foam Brush
  • Painters Tape
    Make sure your items are clean and dry.  The steps are the same regardless of how much of the foil sheet you are using.

STEPS:

  1. Brush a thin coat of adhesive over your item
  2. Let dry until tacky -- the glue will turn clear
  3. Carefully (this stuff is really thin) remove a sheet or piece of the foil sheet keeping the paper on behind it.
  4. Apply over the area you have covered with glue.
  5. Press into place with your fingers or brush into place with a gilding brush
  6. Let sit for a minute and then carefully remove the foil sheet.
  7. Depending on how you have applied the glue, you may have holes in the metallic, the glue is still tacky at this point, so you can use scraps to fill in the holes.
  8. Once dry, gently brush off excess foiling with a foam brush.  NOTE:  Do this over a garbage pail otherwise you will have bits of foil everywhere for days!  
Here are some of the items I tried:

Small mason jar:  I wanted to create a striped effect instead of solid.  Apply painter's tape where you don't want the foil to appear.  NOTE:  This step is done before you apply the gilding adhesive. Also, leave tails on the tape so it is easy to remove. 

 In my first attempt, I did not allow the glue to set up enough so the coverage was disappointing.  No problem, I just went over it again with another color.  I then added a strip of washi tape in the middle for some interest.


Medium mason jar:  For this jar, I wanted a solid effect and used the silver foil.


Milk bottle:  I was curious to see if the foil would remain on the raised lettering of the milk bottle.  I wanted this one to look a little more beat up.


Plastic champagne glass:  You won't be able to drink out of this glass, but I think it is such a pretty look for a display.  This application could also be used on bowls to make your table sparkle.


There are more examples and tutorials on YouTube which will give you some more great ideas.  Have fun playing -- you get a lot of sheets in one package!